
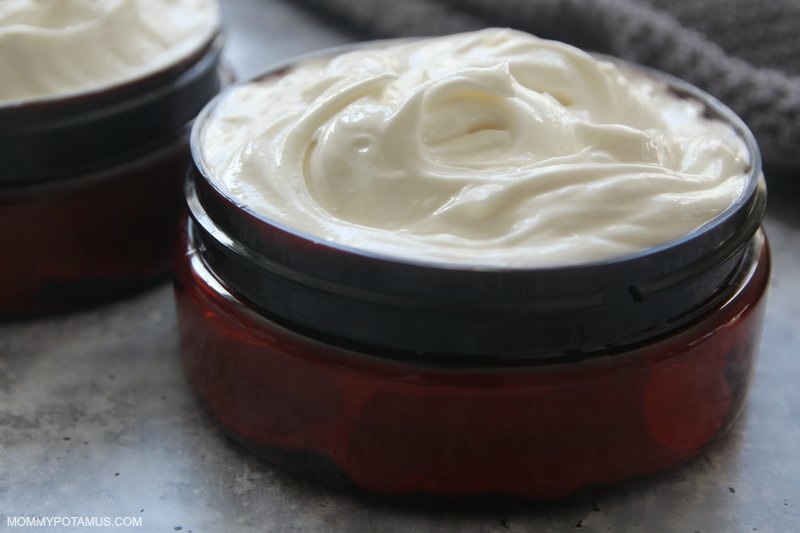
After testing countless variations and hearing “Mama, can I eat that?” on more than one occasion, I’m so excited to share my absolute favorite whipped body butter recipe with you. Although it does look good enough to eat, I promise you’ll enjoy it a lot more if you use it to nourish your skin.
It’s not greasy, leaves skin feeling SO SOFT, and is super simple to make. Here’s the basic process:
- Melt ingredients together
- Place them in the freezer until partially hardened
- Whip like you would frosting or whipped cream
It really is that easy. Plus, unlike homemade lotion which contains water and therefore needs to be used up quickly if you’re not adding a preservative, homemade body butter is relatively shelf stable and can last for several months.
About The Ingredients
This recipe is pretty flexible in terms of ingredients, so you can probably use at least a few things you already have on hand. Just make sure to use high quality butters and cold-pressed oils to ensure that your body butter stays fresh for as long as possible.
You can also help prevent early oxidation (rancidity) by adding an antioxidant such as vitamin E if you’d like. I’ve included instructions for doing that in recipe, but almost never do it personally. Because I’m using high-quality ingredients, I know my body butter will stay fresh for at least several months and that’s more than enough time for me to use up a batch.
With that in mind, let’s take a look at the ingredients in this recipe:
Nourishing Butters
Antioxidant rich butters derived from cocoa beans and shea tree nuts form the foundation of this recipe. They nourish skin while also helping to seal in moisture. Although sometimes used interchangeably, they do have their own “personalities” and yield different body butter qualities:
Cocoa butter is a hard butter derived from cocoa beans. It smells a little like chocolate and is on the firm side, which adds a luxurious thickness to the body butter. It tends to yield a very dense butter if used solo in a recipe, so I prefer to blend it with another butter for a lighter whipped texture and easier absorption. When mixed with peppermint essential oil it smells faintly of peppermint white chocolate.
Shea butter is a softer, more pliable butter that is derived from the nuts of the African shea tree (karité tree). It’s naturally rich in vitamin E and is considered a good choice for all skin types. It absorbs quickly without leaving a behind a greasy feeling, making it one of my favorite butters to use in DIY products.
Moisturizing Oils
In addition to our butters we’ll be using two types of oil – one that’s solid at room temperature (coconut oil) and one that’s liquid at room temperature.
Coconut oil is rich in fatty acids such as linoleic acid (which helps skin retain moisture) and lauric acid (which has a beneficial effect on collagen production).
Any liquid oil – In addition to coconut oil, you’ll also be using a liquid oil of your choice. Some of my favorites are olive oil, sweet almond oil, jojoba oil, and apricot oil.
If you’d like, you can infuse your liquid oil with a skin-nourishing herb to amplify its beneficial properties. I’ve put together tutorials for a few of my favorites, including:
- Calendula oil – Calendula petals are rich in compounds that nourish, hydrate, and support skin healing, which is why they’re often used in skincare products. Click here to learn how to make calendula oil it or buy it here.
- Dandelion oil – These sunny yellow flowers are full of anti-inflammatory antioxidants, polyphenols, flavonoids and minerals that support and protect your cells, soothe skin irritations and nourish dry skin. For example, one study found that both dandelion flower and leaf extracts protect against UVB-related photoaging and senescence (aging at the cellular level). Click here for my step-by-step tutorial.
- Comfrey oil – Sometimes called knitbone or All Heal, comfrey is often recommended for moisturizing skin, easing tight muscles, and soothing sprains, bruises, and swelling. Here’s how to make it into a skin-nourishing oil or salve.
Arrowroot Powder
The arrowroot powder in this recipe diminishes the oily finish associated with other homemade body butters. If you don’t have it on hand, tapioca starch or non-GMO cornstarch are good alternatives.
Essential Oils
Although totally optional, essential oils are a great addition to this recipe. My personal favorites to use are:
- Frankincense carteri (Boswellia carteri) or Frankincense serrata (Boswellia serrata) – Relaxing, thought to promote youthful looking skin.
- Lavender (Lavandula augustifolia) – Calming and helpful for soothing irritated or dry skin.
- Peppermint (Mentha x piperita) – Refreshing, helpful for muscle relaxation. Also smells like mint chocolate when blended with cocoa butter.
Tip for Applying Body Butter
The best time to apply body butter is right after a bath or shower when your skin is moist and your pores are open.
Start with a little to see how much your skin is ready to absorb, then increase the amount used if needed.
How To Make Whipped Body Butter
Ingredients:
- ¼ cup grated organic cocoa butter
- ¼ cup unrefined shea butter
- ½ cup coconut oil
- ½ cup liquid oil (olive oil, jojoba oil, sweet almond oil, apricot oil, etc.)
- 2 tsp arrowroot powder (can substitute tapioca starch or non-GMO cornstarch)
- 1 tsp naturally derived vitamin E (optional)
- 15-30 drops lavender, frankincense, or peppermint essential oil (optional)
Step 1: Measure

Measure the cocoa butter, shea butter, coconut oil and liquid oil and add them to a stainless steel pot or bowl.
Step 2: Melt
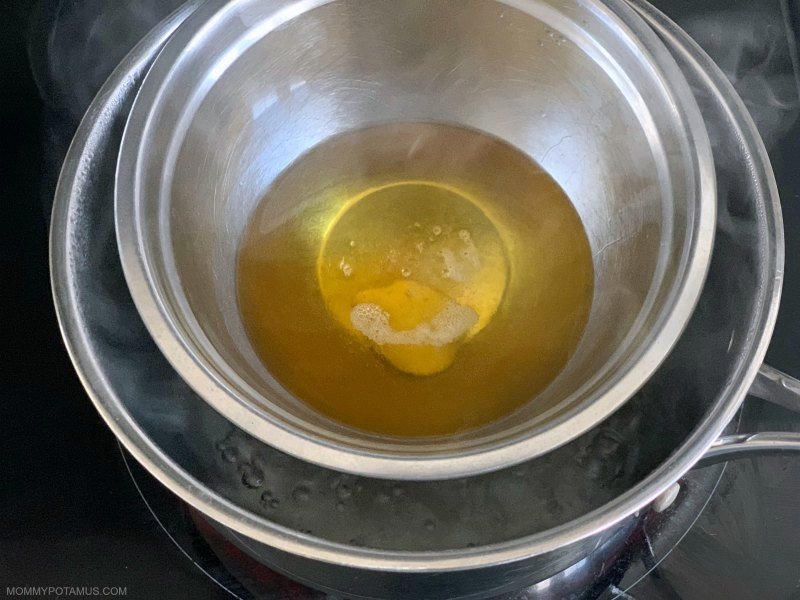
Using a double boiler or a pot of boiling water with a smaller pot or stainless steel bowl fitted inside, melt cocoa butter, shea butter, coconut oil and liquid oil together over medium heat.
Step 3: Freeze
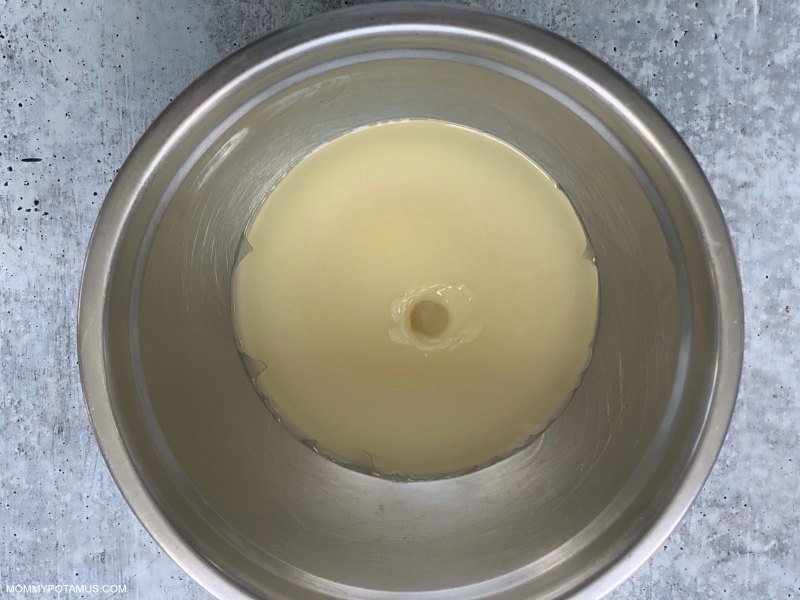
When the oils are completely liquid, remove them from heat and place the bowl/pot in the freezer to firm up. Make sure to use a stainless steel vessel that can handle the transition from hot to cold.
When the mixture is hardened enough that you can press your finger in it and make an imprint, remove it from freezer.
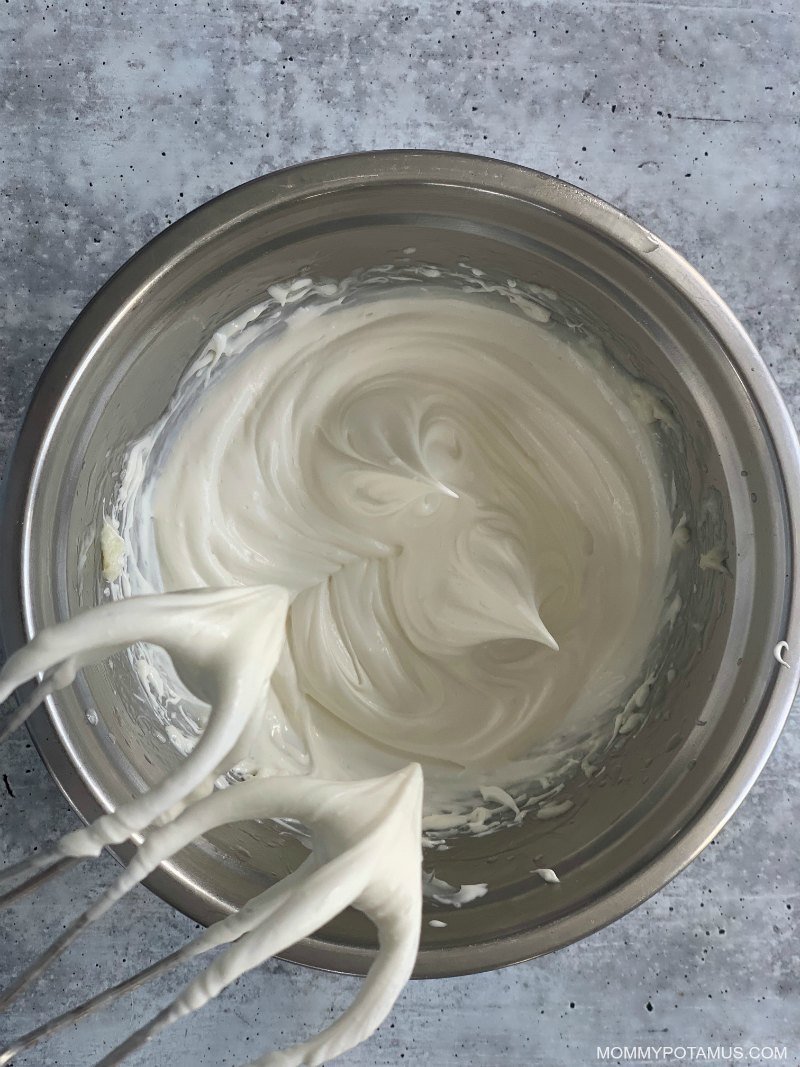
Step 4: Whip
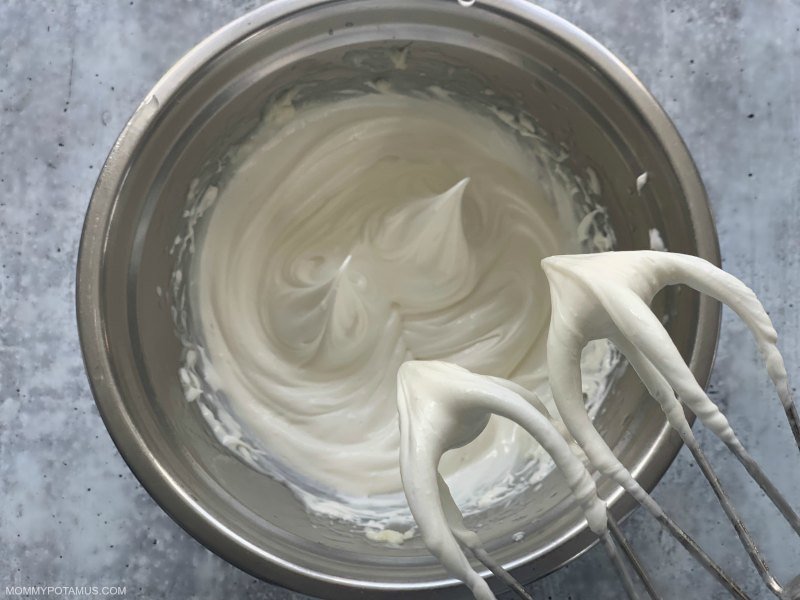
Add the essential oils (if using), and vitamin E (if using) to the bowl.
Using a stand mixer or hand mixer, start whipping the mixture on the slowest setting and gradually increase the speed as the mixture softens. Whip until it transitions from yellow to white, then lower the mixer speed back down and whip a little more to make it extra fluffy.
Once the body butter is light and fluffy, add the arrowroot powder and whip again to mix it in.
Store in an airtight glass jar and keep out of direct sunlight, which promotes oxidation and may cause the homemade body butter to melt if it heats up too much.
Frequently Asked Questions
What is the shelf life?
Homemade body butter is relatively shelf stable and can last for several months, sometimes even longer. The main thing that can reduce shelf life is to use oils and butters that are old or haven’t been stored properly. Ideally, they should be kept in a cool area that is away from direct sunlight.
Can I use a different butter instead?
Yes, although it may change the lightness and texture some. Mango butter works pretty well as a substitute for shea butter although it doesn’t become quite as light and fluffy when whipped.
DIY Whipped Body Butter Recipe
Equipment
- double boiler or stainless steel bowl / pot
- stand mixer or hand mixer
- airtight glass jar
Ingredients
- ¼ cup organic cocoa butter (grated)
- ¼ cup unrefined shea butter
- ½ cup coconut oil
- ½ cup liquid oil (olive oil, jojoba oil, sweet almond oil, apricot oil, etc.)
- 2 tsp arrowroot powder (can substitute tapioca starch or non-GMO cornstarch)
- 1 tsp naturally derived vitamin E
- 15-30 drops lavender, frankincense, or peppermint essential oil (optional – can actually use up to 50 drops which is a 1.5% dilution rate)
Instructions
- Using a double boiler or a pot of boiling water with a smaller pot or stainless steel bowl fitted inside, melt cocoa butter, shea butter, coconut oil and liquid oil together over medium heat.
- When the oils are completely liquid, remove them from heat and place the bowl/pot in the freezer to firm up. Make sure to use a stainless steel vessel that can handle the transition from hot to cold.
- When the mixture is hardened enough that you can press your finger in it and make an imprint, remove it from freezer.
- Add essential oils (if using) and vitamin E (if using) to the bowl.
- Using a stand mixer or hand mixer, start whipping the mixture on the slowest setting and gradually increase the speed as the mixture softens. Whip until it transitions from yellow to white, then lower the mixer speed back down and whip a little more to make it extra fluffy.
- Once the body butter is light and fluffy, add the arrowroot powder and whip again to mix it in.
- Store in an airtight glass jar and keep out of direct sunlight, which promotes oxidation and may cause the homemade body butter to melt if it heats up too much.
More DIY Body Care & Skincare Recipes
Lotion Bars – Hardened with a little beeswax to make them into bars, lotion bars are a portable option to keep in your bag for skincare on-the-go.
Lip Balm – This tried-and-true, super easy lip balm recipe moisturizes and protects with beeswax, natural cocoa butter and your choice of moisturizing oil.
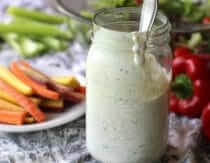
Sugar Scrub – Sugar contains naturally occurring glycolic acid, which dissolves old, dead skin and makes exfoliating easy. The warm vanilla scent of this sugar cookie version makes it one of my favorites.
Skin Repair Serum – This two-ingredient serum contains cold-pressed rosehip seed oil, which researchers say promotes collagen production, helps to even skin tone and fade brown spots, and supports scar healing.
FREE Ebook: DIY Body Care Gifts Made Simple
Do you want to give gorgeous, handcrafted gifts for family and friends, without spending a bunch of time on them?
Then I’d love to give you a free copy of DIY Body Care Gifts Made Simple – my step-by-step guide to making gorgeous handcrafted gifts without stressing yourself out – as a gift for signing up for my newsletter. I’ll show you how to make vintage labels, luxurious lotion bars, lip balms, sugar scrubs, body sprays and more like a pro. Sign up for my newsletter and you’ll be redirected to the download page immediately!

Yayyy!! Thank you! 🙂
Yeah, I totally want this to be a food.
Oh my goodness, I need this in a food version, it looks that good!
Can I use mango butter?
Heather, wow! This looks incredible!! I wanna make it right now!
I am going to have so much fun making this to give away for the holidays this year!
Yay, I’m so glad to hear that Sarah!
Hi Karen! I don’t have a release date yet, but I’m hoping it will been within the month 🙂
Oh my! That makes me want to sit down with a spoon and eat! Can’t wait to try this recipe. Your photo is amazing too! 🙂
I will be making some body butter for gifts you made it sound so easy thank you for sharing
This looks great! So fun!
This seriously does look like frosting! I love making my own beauty products and this one looks like a giant keeper…And I bet it would make wonderful Christmas gifts.
Hi Laura! There’s a link to my contact form on the page – just send your mailing address with “Body butter giveaway” in the subject line and you’re good!
Were do you get your shea butter, and do you think mango butter could be used instead?
Hi Erin! You could definitely use mango butter instead! It may not be quite as fluffy but it will be wonderful. 🙂
This stuff looks good enough to eat! Thanks for sharing the recipe!
How much does this recipe yield?
Hi Betsy! The total volume varies depending on how much air is whipped in, but I’d say about 10-12 oz.
I just finished making this, and it absolutely smells wonderful!! I whipped & whipped & whipped till I got it to the consistency I wanted, but it seems to melt really quick, how do you keep the consistency?? My house is not hot…just wondering.
Hi Mary! It will melt on contact with your skin but shouldn’t melt in the container unless the room is warm. Is it returning to a liquid state or just settling a bit from the light, airy whipped state?
Hi Heather…it actually was just settling a bit from its whipped state, once i put it in a container it kept its shape, and is wonderful!! Thank you!!
Wow… the body butters are great, especially in the cold and dry winter
I made this exactly as you said to and have been whipping non-stop and it is still liquid. 🙁
Don’t worry, Kristina! It’s probably just that it wasn’t chilled enough. Try chilling it again and then re-whipping.
You’re right! Once I almost gave up I looked and it was thicker! This stuff is amaaaazing, the scent is so delicious I wanted to eat it! (But it definitely doesn’t taste good – LOL) thanks so much for the recipe.
Hi Tricia! You can probably find good quality cacao butter/organic liquid oil at your local health food store, the vitamin E is optional (not really necessary if you’re planning to use it within 3 months ot so) and you might find a local essential oil distributor that has stuff stock so you can save on shipping. Hope that helps!
Hi Tricia,
I just ordered from Essential Depot, and their products are wonderful! Many have been on sale for the holidays, so you should definitely check them out. High quality for less. 🙂 My cocoa butter smells heavenly – I’m very happy with my purchase and would buy from them again.
This is a recipe that I’ve found elsewhere on the internet, but I made it and I find it to be quite heavy and oily, although it does absorb into my skin well…especially right after a shower or bath. I’m going to try the recipe again with less coconut oil and slightly less jojoba, and see if I can still manage the whipped consistency. I’ve also read that adding a teaspoon or two of arrowroot or cornstarch can cut the oil a bit. I might try that, too. Thanks!
Made this yesterday. It’s amazing! Thank you!
Not yet, but I do have plans to put it up for sale on Amazon 🙂
I don’t get why to use a double boiler or two pots?
Heather, do you have any brand recommendations for the “naturally derived vitamin E” you mention in this recipe? I seem to remember searching for something acceptable a few months ago and having a heck of a time! I want to start making some of my own makeup, and I believe the vitamin E helps extend the shelf-life a bit?
Natural Factors is naturally derived from non-GMO sources
Awesome, thanks!
Hi Mandi! You may try the method described in this post: http://holisticsquid.com/whipped-body-butter-homemade-lotion/
Okay, I have never made a body butter before, so I am going to ask the silly question. Do you use a mixer that is solely for this type of work or is your regular kitchen mixer that you use for food okay? Do they need to be separate?
They don’t need to be separate! Just use your regukar mixer and wash like normal..
I would love to see a video of this. Please consider making a video for those of us who need the visual! Thanks!
Because lavender and coconut oil as well as shea butter are good for sunburns, I wonder if this would be soothing to someone suffering from sunburn? Can you think of any reason why it wouldn’t be good to try? Or, has anyone that you know tried it for that purpose? Just curious! 🙂
Anyone know where to order small glass jars so I can keep this in my purse, desk at work, and give out as gifts?
Lauren – I’ve found lots of great containers at http://www.specialtybottle.com
Hi Heather,
Did you use refined or unrefined butters for this recipe? Do you have a preference in general? I’ve heard it’s good to use unrefined, but wasn’t sure about the smell (esp with Shea butter). Thanks for your thoughts!
Melissa
I used unrefined 🙂
You have some great recipes that I am definitely going to be trying out with my girlfriends! This one looks especially enticing. My feet have been getting more dry from the changing weather.
Hi, I really want to try this but my skin gets a rash when I use cocoa butter, could I make this with a combo of shea and mango butter? Thanks!
Yes you can. It may have a slightly different consistency, but it should work 🙂
Hi Heather I would like to make this into a magnesium body butter. Can you suggest how much magnesium oil or flakes to mix in?
Erin
I know this comment is wicked old, but better late than never? 🙂
It was cool finding this recipe because it’s very similar to my “special” body butter (people beg me for that stuff lol)! 😉
I started making my own body butters in hopes that it would help with my severe Chronic Pain and Health conditions, “CRPS aka RSD” & Fibromyalgia.
So I’ve done A LOT of research on the numerous different butters,carrier oils, essential oils, herbs, and other natural ingredients that focus on sensitive skin, cracked/chapped skin, rashes, inflammation, circulation, skin regeneration, etc etc. (I have way too much time on my hands ? Lol)
Anyhoot- I just wanted to share that If you can’t use cocoa butter, Kokem Butter is a fantastic substitute. (I use both together in my recipe because they both have great health benefits!). Another option is illipe Butter, which is another “hard butter” with some awesome benefits as well!
Thank you for sharing such great info!
🙂
-Heather Lynn
Not yet! 🙂
made it, love it, and gifting it!!!
I would want to eat that…
Making this!
Yeah, I don’t think I could make that without eating some.
Ohhh!!!!! I love this!!!
Must make.
Wait a minute…didn’t you just have a baby? How on earth do you find time and energy to post these awesome things? I have a blog but haven’t even updated it so long (and my baby is 8 months).
Lol, Amy Pogrebin Bremenstuhl. Truth be told, I am on bedrest after our trip to NYC to have Levi’s tie revised. Running through an airport with a newborn to make a flight 3 minutes before it takes off is a little too much exercise for a postpartum mama. My mom is here taking care of me.
hi heather!
i just made this yesterday and i have noticed that once it sets, it hardens. is that how it is? i thought its going to remain soft like the whipped-state.
would love to hear from you.
Hi Leng, it shouldn’t harden unless the environment is on the chilly side. It will settle and become a bit more dense, though. Hope that helps!
I’m making this currently and it won’t form into peaks. Is still completely liquidy. I read the comments so will try to cool it longer. I’m wondering also if I should use the hand mixer you are using rather than my hand blender. Unfortunately my blender doesn’t have the mixer or whipping attachments…
I am so excited to try this, but it would be so helpful if you could put how many ounces your recipes make, so that I know the size my containers should be. 🙂 I am assuming this will make 1 cup, but when whipped is it more?
Thank you!
The total volume varies depending on how much air is whipped in, but I’d say about 10-12 oz.
This stuff is INCREDIBLE. So luxurious and the scent is off the chain. My kids try to eat it. They asked me today where the hot chocolate was after they smelled it on me! I’m totally gifting this! One question: my powder/oil mixture had clumps but I didn’t know until I finished whipping everything and was putting it into jars. Can I re-melt and re-whip the whole shebang? Thank you SO MUCH for all the time and energy you invest in this blog. You have helped and inspired me in SO many ways since I started our “wellness” journey over a year ago. You’re totally amazing.
Yes, just melt and re-whip!
I made this today, and am totally in love with it. I made a few adjustments. For the butters, I used the same amount of cocoa butter, and 2tbsp each mango and shea butters (because I was running low on the mango, and thought the shea smell would overpower the cocoa butter scent). For the oils, I used the same amount of coconut oil, and 2 tbsp each jojoba and almond oils (jojoba is friggin expensive!). I also decreased the peppermint oil, and it perfectly complimented the cocoa scent without overpowering it. Love the fluffy white goodness. Imade this for gifts but am seriously considering hoarding it all for myself.
How much does this make, and I didn’t see where in the directions to add vitamin E oil or the essential oils. Do you add them right before whipping? Also, do you not use any beeswax? If one wanted to add beeswax, would that be okay, and how much? I am new at lotion/body butter making. But most recipes I have read use beeswax.
I finally went out and got the ingredients to make this yesterday to give as Secret Santa gift (half the batch anyway, I’m keeping the rest).
The texture turned out lovely but I’m SO glad I trusted my instinct regarding the essential oil, I only put 20 drops in (1/6th the low amount in the recipe) and it’s still very pepperminty to me, I like my lotions on the barely scented side.
Thank you for sharing this recipe!
Okay so i just tried making this recipe. Which i was so excited to try. Im reading the comments and see alot of people are having problems with it being to runny. My problem is its HARD! I dont know what i did wrong, but pretty much as soon as i added the room temp oil/cocoa mixture it turned clumpy like. What a waste 🙁
Hi Amanda, I’m so sorry you had trouble with the recipe. Is it possible that it is just too cold? Perhaps if that is the case it will soften as it reaches room temperature.
I bought a rice cooker that I use to melt my oils, I don’t even have to clean it after use, just put the lid on it to keep the dust out. Works great!
I bought a rice cooker that I use to melt my butters, I don’t even have to clean it after use, just put the lid on it to keep the dust out. Works great!
..and this recipe is awesome!
Hi Heather! Thank you for the recipe. I’m really looking forward to making this. I’d love to make a bigger batch though – does this recipe double well?
It does if you have a big enough bowl 🙂
Lol! That’s just what I was hoping 🙂
I’ve only done one body butter, and it wasn’t heated so I just wanted to make sure the cooling would work well with a larger amount. Can’t wait to try it! I might even do it tonight while I’m at my brother’s house for Christmas dinner.
Happy holidays!
This sounds so luxurious! I’ll be featuring it on my blog (homemakinghearts.com) tomorrow and sending folks your way for instructions! You’re doing a great job!
I would also like to invite you to HomemakingHearts.com on Fridays for a brand new link-up; it would be a delight to have you join us!
Gabriella
This recipe has been on my mind since I first found this blog.. When I think of Mommypotamus, in my head I instantly make a connection to THIS recipe (not joking), marshmallows and gummy stars (can’t make them though, no one wants to send grass-fed gelatin to my country:(:(:( I just dream about them:D), morning sickness article and an awesome mother, who just literally knows everything..
That being said, I just wanted to share my excitement over emptying my body butter jars and shopping for ingredients to make this one! 🙂 I have been waiting for this moment a loooooooong time!
What method do you use to measure out solid butters such as the cocoa, shea, mango, etc.? Do you have to melt some and then measure out of that? (Which would be a lot of hassle.) Or do you have another way? I wish more body care recipes gave the measurements in weights! I’d really appreciate your response! 🙂
I grate the cocoa butter before placing it in stainless steel individual measuring cups to get an accurate amount. The shea is more pliable so I just scoop it in.
hmmmmmmm….We may have to try this!
I love the sound of this. I do have a question. There are a lot of recipes that are measured in cups. My butters (cocoa and shea) are in solid form when i buy them. What do you do to measure in cups? I love making home made items, i just started a few weeks ago. Any help would be great.
Katie
You GRATE the solid bars into the measuring cups
I am making this now and my kids are hovering asking me when they can eat it…lol!!!! Guess I better hide this one up high somewhere!
I’m sensitive to coconut oil. What could I substitute for the coconut oil and still have the recipe turn out? Or would nothing else work?
Haha! I’m glad both you and your cat like it 🙂
I just made this yummy smelling body butter. I love it! I do have one little problem though… When I apply it do the skin its grainy- like little pieces of shugar. I did use the cocoa powder I already had at hand. I guess it’s from there…? Any suggestions of what I could do about this?
Sometimes shea butter can crystallize and cause a grainy texture. It doesn’t happen often, but it should be pretty simple to correct by re-melting andr re-whipping.
Hi Heather!
Where can I find jojoba oil? Since this takes 1/2 cup I cannot find it bigger than 4 ounces. So I am wondering where you purchase yours. Thanks!
Anhydrous products don’t require preservatives because they don’t contain water or glycerine (hence, the reason they’re called ‘anhydrous’).
However, should the product be something like an anhydrous sugar or salt scrub, where there’s an excellent chance that water droplets are going to get inside the product, then yes, it would need a preservative – preferably a combination of two.
Hi there! When using the vitamin E – do you just open the caplets? Normally I see it with an eye dropper. Thanks! 🙂
I used once jojoba, and another time mild olive oil: jojoba is better for the taste
Is the arrowroot powder for structure or for other reasons. Thinking of leaving out the next batch I make. Nice recipe. Thx. God bless.
It’s to help the body butter have a less oily finish. You can leave it out if you’d like, though.
This is good stuff….but….mine turned out oily-ier thanks I prefer. I see comments that others have said same thing.
Waiting for response on how to remedy oily-ness
Thanks!
The arrowroot should diminish the oiliness. I haven’t found this formula to be too oily so I haven’t troubleshooting, but a couple of suggestions come to mind:
1. Use less so that the body butter absorbs into your skin rather than sitting on top.
2. Add a little more arrowroot and re-whip.
Can you add peppermint essential oil so it’s a mocha peppermint or would alter the consistency?
Because my home is sort of cold, this turned moussey. But, it smelled and felt amazing. I was a little afraid when it was a bit runny during the whopping phases but I just left it alone in the ice bath and it set up really hard. Then I whipped it again and it was perfect. I will for sure make this many more times!
I love this, but have the same curiosity as another reviewer, can you add beeswax to it, and if so how much and when? How does this alter the product…if you happen to know.
Thanks!
Hi I was wondering can u take out the coconut oil? My dad doesn’t like the smell it gives him a headache.
I’ve been wanting to try a whipped lotion/body butter for a long time, and this simple recipe was perfect! There are so many more complicated recipes out there, using beeswax and other things that just complicate the process. This was quick and easy, like so many of your recipes!
I used arrowroot powder and left out the peppermint oil so that I could have a mild and simple body butter. I will definitely be adding this to my list of regular recipes. Thanks mommypotamus!
Ebay has Fairtrade organic Cocoa Butter, African Shea, Mango Butter. Just follow your source and make sure it is what they say it is. I have had very good quality butters. Vitamin E Now from ebay too! Way cheaper then Mountain Rose but I do order and love Mountain Rose also 🙂
Hi, I also had a long time whipping with still liquid and I only have a stand mixer which is where I usually start my lotions with solids. Is there any reason you melt it first and do not put right to mixing from solid state? Which is the way I am going to start my second batch to see the difference 😉 I am in the middle of try to get it cold enough to whip right now!
I melt it to make the blending of the solid and liquid fats easier 🙂
I love this however I’m always stumped when I make it. When should I add the peppermint oil and vitamin E to the mixture? Thanks!!
Hi Heather! This is amazing, but I was wondering if it is safe for pregnancy and while nursing? Thank you.
Hi I live in the Caribbean, and I love this recipe and I made it and at first it was beautiful, fluffy and wonderful, then it got a bit stiff, and I am wondering if there is anything I can do to keep the fluffiness of the butter. Thing is its a hot climate here, so you would expect the butter to melt, but it doesn’t melt it gets stiff and a little difficult to rub. Can anyone help!!!!
Hi Tricia, I’m not sure why that is happening – maybe it’s a reaction to the humidity or salt in the air? Have you tried re-whipping it to see if that helps?
I can’t wait to make this body butter. However, I was wondering, will it be the same if I use weights instead of dry measurement? Its hard to measure out hard butters (into cup measurements) so I was wondering if I should just use 4oz by weight for the 1/2 cup measurement. I love all of your recipes and thank you for your posts.
The weight and volume will not be equivalent for this recipe. The recipe is very forgiving so even if you don’t measure perfectly it will work out.
Not clear on measurements. Should ingredients be measured while still solid…or after becomes liquid? I believe that would be 2 different amounts. Thanks
Hi Heather
Thank you for the lovely blog. I have tried your whipped body butter and it is simply the best. Please let me know if it’s still possible to get the free DIY Body Care Gifts Made Simple as mentioned above. I subscribed, but could only download the Kitchen Apothecary.
Hi Tracy, you can fill out the form above even if you are already a subscriber. You won’t get two emails from me (promise!) and after you fill out the form you’ll be taken to a page that has an orange download button for DIY Body Care Gifts Made Simple. I just checked it and it is working 🙂
I was wondering on incorporating magnesium into the blend. Should I use Magnesium Oil or simply use Magnesium Flakes? ..and what quantity ratio should be used?
Thx in advance, luv the recipes and possibilities this bring about.
What would you suggest replacing the coconut oil with? More shea or olive oil?
Hello,
It’s unclear when to add in the arrowroot. Your instructions show adding it twice….step 4 and step 6. When would be the right time?
Thank you for you help.
Oops, thanks for catching that! Either will work but I think it’s easier to whip before it’s added. So, step 6 🙂
HI Heather. Thank You for this awesome body butter recipe. I made it tonight and it came out a little grainy? Could it be due to not whipping it long enough? I was concerned about over whipping.
Mine separated the next day help??
Made the body butter, it is devine, 😍kept to exact ingredients, Thank you 😘
Heather, thank you, so much, for all that you share! 🙂
Hi. I’m curious as to what size jars to use/how much the whipped body butter recipe makes.
Thank you.
Help! Like some of you, my mix is too oily, not light and fluffy at all. Unlike some of you, remelting, cooling and rewhipping is not helping. How long are you mixing for? 10 minutes and no improvement. Today is a coolish Seattle April day, so not too hot. Please help!
MY body butter seems to be a little on the oily side so do I add more arrowroot?
what can use use to color the body butter?
I’ve been making body butter & lotion bars for 4 years now. I just wanted to try a new recipe. I saw this one. I used this recipe today 4/6/23, I used Kokum Butter instead of the Cocoa Butter. I did freeze it 10 minutes to long, 1hr 15 min, so I just heated it for 2 seconds, it whipped amazingly!
It looks just like ur picture! Like Lotion! And like Fluffy Marshmallows, in the jar! Yummy …
I used 15 drops of lavender, so the scent is lite. My next batch I will make it scentless. No reason really, probably because I always think about it, but never do it!
I chose Sweet Almond oil and added a couple tblsp of Apricot to basically use the rest of the bottle. I did add a little E, not as much as noted, only because I was almost out.
In the past when I’ve added Arrowroot it felt grainy, this time I don’t feel a thing!
I always let mine sit for at least 12 hours to cure, see how the consistency turns out. I think this is a great recipe.
Thank you!
Susie
Great site. So informative. Thanks.
Hello!
I made the whipped body butter a few days ago. It was so easy to make, but I wanted to use it a few times before I reviewed it. Well, it’s really something! It literally melts right into your skin and smells so good! It’s a great thing! I really appreciate all your research and all your great ways for us to “DIY”! Thank you!
I haven’t made body butter before and have looked at lots of recipes. Yours sounds great. I notice the the proportions of oils are twice that of the butters, whereas most of the other recipes use equal amounts or some use more butters than oils. I am concerned that yours will be too oily even with the arrowroot powder. Do you find it’s pretty soft?
Thanks!