
The cure for anything is salt water – sweat, tears, or the sea”
~Baroness Karen Blixen
I love the sea like some people love chocolate. Nothing stills my soul like the sound of waves lapping away every last worry as the salty breeze kisses my skin. When I’m feeling a little ragged – which, uh, happens from time to time while parenting, right? – I crave what my husband Daniel and I call “beach therapy.”
Unfortunately with three little ones and a homestead, we can’t just pick up anytime and head to the shore. So when I can’t go to the beach, I make beach therapy in a bar.
While it’s just as easy as my three-ingredient pure coconut oil soap, it’s got a personality of it’s own. The lather is so luxurious I can’t help but feel like I’m at a spa when I work it through my hands, and I love the way my skin drinks in its moisture. And of course it contains one of the greatest gifts of the sea – mud!
If you’re new to making soap and feel a little intimidated by the process, it’s easier than you might think. Here are some common soapmaking myths that often prevent people from giving it a try, but shouldn’t.
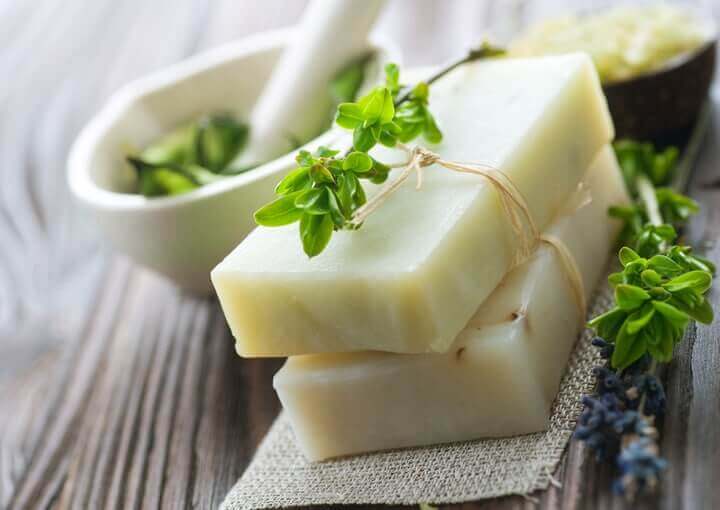
Why Sea Mud Soap?
Sea mud – also known as French green clay – is often called majestic clay . . . and for good reason. It contains montmorillonite, decomposed plant material such as kelp and seaweed, magnesium, calcium, potassium, dolomite, silica, manganese, phosporous, silicon, copper, selenium, and up to nine mineral oxides.
These elements work synergistically to nourish and gently detoxify skin, while the olive oil moisturizes and softens. Though sea clay is recommended for all skin types, it is thought to be especially helpful for individuals suffering from acne, eczema and psoriasis.
Now, let’s get started.
How To Make Sea Mud Soap (Clay Soap)
All amounts are by weight:
Ingredients
- 20 oz. olive oil
- 10 oz. coconut oil (where to buy coconut oil) *
- 11.4 oz water (preferably distilled)
- 4.2 oz lye (where to buy lye) **
- 2-4 level tablespoons sea mud, also known as French green clay. Use two for a more moisturizing bar and and four for a more deep cleansing/detoxifying bar. (where to buy french green clay)
- 1/2 ounce essential oils (I like rosemary for this recipe, but cedarwood, lavender and tea tree are also good options)
* For soap making purposes there are several types of coconut oil. The stuff I buy has a melting point of 76 degrees. This is the most commonly available kind and the preferred type for soap making. There is also a coconut oil that has a melting point of 92 degrees and another that is “fractionated,” meaning that the long chain triglycerides have been removed, leaving only saturated fats. I have not tested this recipe with either the 92 degree or fractionated oils, but it works well with the 76 degree type. ** You can often find 100% lye in the drain cleaner section of a mom n’ pop hardware store. Lye is a naturally occurring substance that can be made by burning hardwoods and boiling the ashes, but it’s much easier to just buy. If you don’t see it, ask a sales clerk for help. They may be keeping it behind the counter because it has multiple uses. Be prepared to explain that you want to make soap, not meth. 🙂
Equipment:
- crock pot – 8 quart
- stick blender
- digital scale
- thermometer
- glass measuring cups
- small glass bowls
- plastic or stainless steel spoon with long handle
- rubber spatula (0ptional)
- sink or bowl filled with vinegar and water for cleaning anything that comes in contact with lye. Follow by cleaning with soap.
- protective equipment: long-sleeved shirt, plastic/rubber gloves, safety glasses or protective eye gear
- soap mold – (where to buy oval soap mold or square soap mold) A standard sized bread pan is perfect for this batch, cardboard boxes will also work
- parchment paper for lining the soap mold (where to buy parchment paper online)
Photo Tutorial:
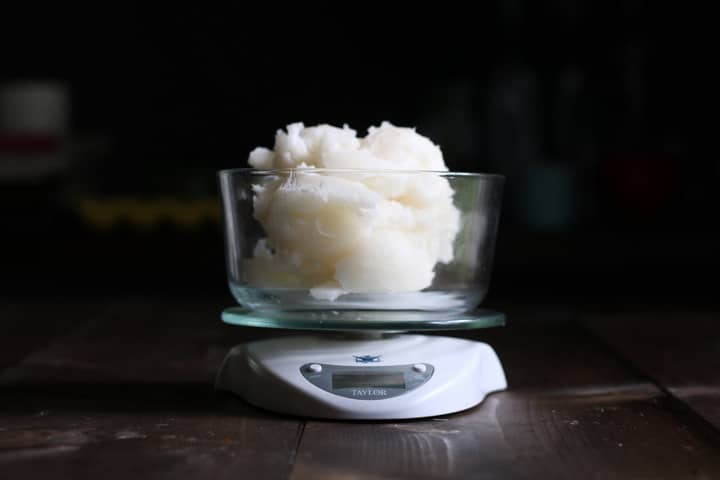
Step 1: Weigh all your ingredients.
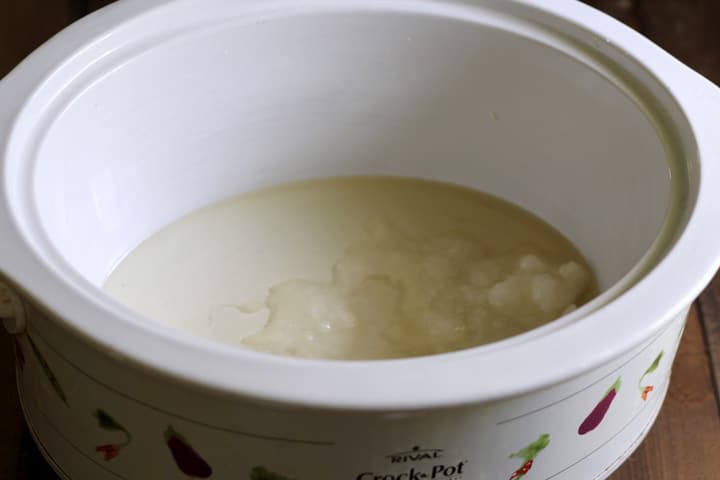
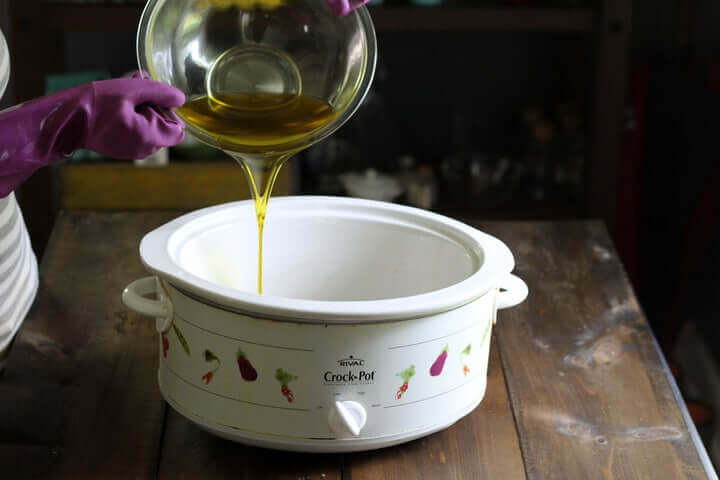
Step 2: Add coconut oil and olive oil to the slow cooker. When they are almost fully melted move on to step 3.
Step 3: Add your water to a medium-sized glass or ceramic bowl and take it outside along with the lye and long-handled spoon.
While wearing your protective gear and taking care not to breathe the vapors, slowly add the lye to the water while mixing gently. Order is important here, so make sure it is the lye you’re pouring into the water.
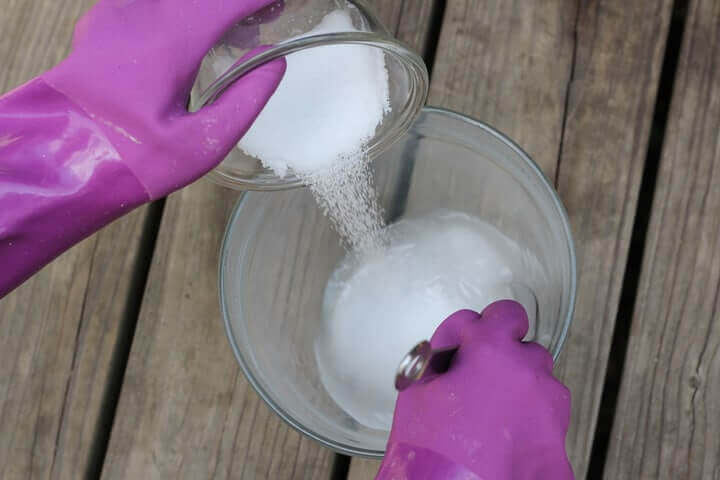
The mixture will get very hot so be careful! Let it transition from cloudy to clear, then bring it inside. Let cool for 5-10 minutes, then proceed to step 4.
Step 4: Add lye to crockpot (being careful not to splash) and stir a few times.
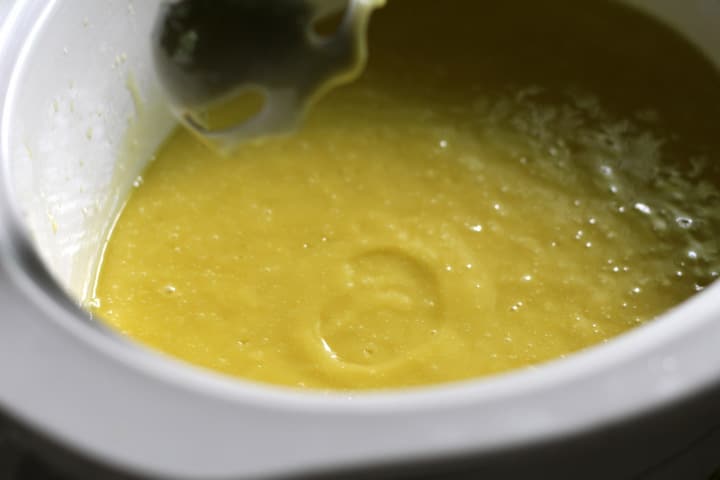
Step 5: Using the stick blender begin mixing toward “trace.” You’ll know trace is achieved when the mixture has the texture and thickness of a light pudding.
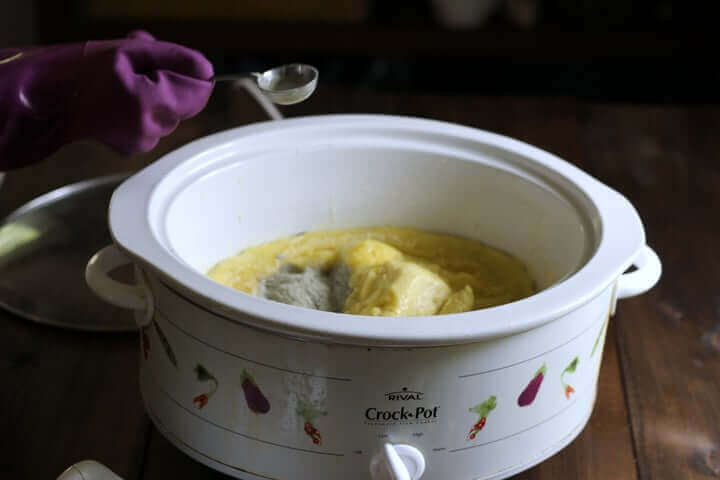
Step 6: Cover and let cook on low. During this process the oils should rise up the sides like a wave and then fold back into the mixture.
Mine usually takes 45 minutes – 1 hour but the cooking time will vary depending on how hot your crock pot is. Check on it often.
Step 7: After the soap has been cooking for about 20 minutes add the sea clay and mix thoroughly.
Some people prefer to add the clay at the end so that it doesn’t go through the cooking process, but I prefer to add it at this point because otherwise I end up with white clumps of untinted soap mixed in the the final bar. In my opinion the therapeutic properties of the clay remain intact when added at this point.
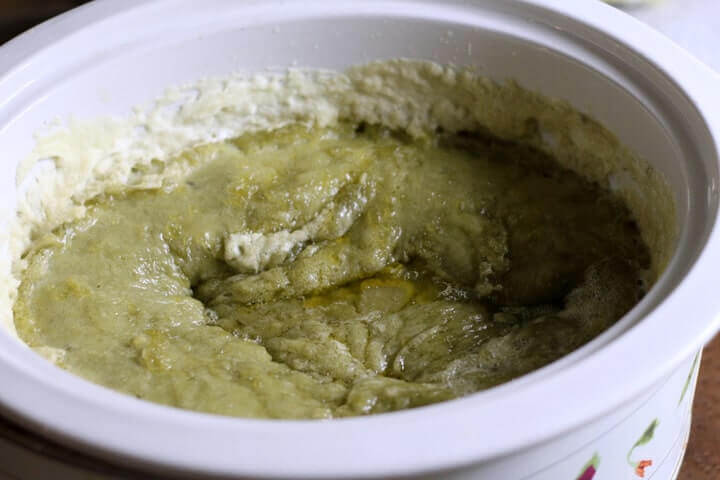
Step 8: When the soap is ready it should look a little like semi-translucent vaseline with no oil puddles in the middle.
In the photo below there is a small oil puddle – this batch is not yet ready.
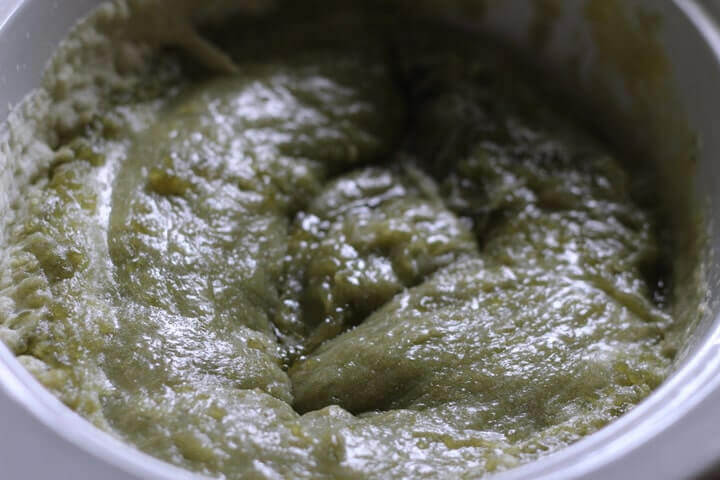
The batch below has no oil puddles, and you can also see how it has risen up on the sides and then folded back into itself. It’s ready to test.
There are two ways to test and see if it’s done. First, dip a PH test strip and wait several minutes for it to fully change color. It should be between 7-10. If it is higher than 10 it’s not done. For a slightly less scientific approach, take a little of the soap and rub it between your fingers. It should feel a bit waxy. Now touch it to your tongue. If it ‘zaps’ you, it’s not done.
Note: It is really important to make sure all the lye is converted – otherwise the finished soap can burn skin.
Step 9: If you’re adding essential oils, wait until the mixture cools a little and then add them, otherwise they will lose their fragrance.
(I added rosemary and peppermint but forgot to take a photo.)
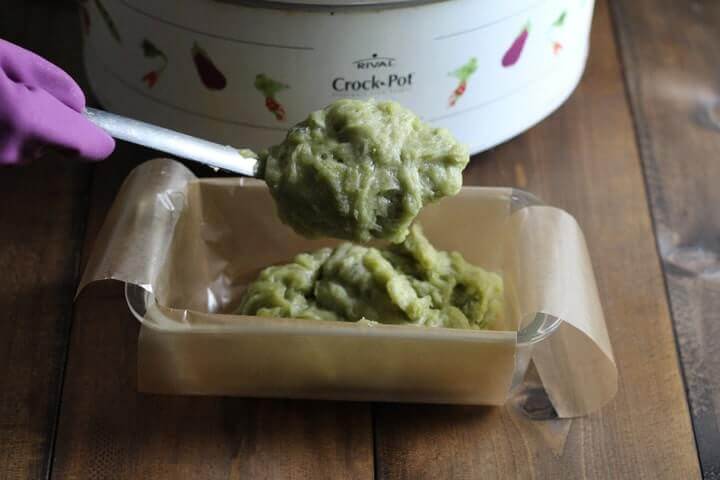
Step 10: Spoon mixture into your mold and let cool. If you want to speed up this process put it in the fridge
Step 11: Cut bars after 24 hours.
Step 12: In an area with good air flow, place bars on a rack/tray with about an inch of space between them.
Allow them to dry out and harden for another few days. Though you can try your first bar right away, it’s best to let them sit for 2-3 weeks to let the conditioning properties fully develop.
Shelf Life About 1 year when stored in a cool, dry place.
Next Recipe: Seaweed Mask
Seaweed is a skin superfood. It contains more minerals than just about any source, and studies have shown that topical applications of 1% extract support collagen production.
A seaweed facial at my local spa costs $175, but I can get one every week for about $0.25 – $0.35 with this recipe.
More Soap Recipes To Try
FREE Ebook: DIY Body Care Gifts Made Simple
Do you want to give gorgeous, handcrafted gifts for family and friends, without spending a bunch of time on them?
Then I’d love to give you a free copy of DIY Body Care Gifts Made Simple – my step-by-step guide to making gorgeous handcrafted gifts without stressing yourself out – as a gift for signing up for my newsletter. I’ll show you how to make vintage labels, luxurious lotion bars, lip balms, sugar scrubs, body sprays and more like a pro. Sign up for my newsletter and you’ll be redirected to the download page immediately!

Can’t wait to try this! Would Bentonite clay work here also?
I’d love to know that too. Just purchased a container of bentonite clay.
I have not tried it with bentonite, but I believe it would work.
Heather, I’m having such a problem with my stick blender. No matter whether I put it in straight up-and-down or at an angle it splashes and I cannot figure out what I’m doing wrong. Can you help me? I’m very new to the whole process of soap making
You may need to make a larger batch or use a narrower pot so that the oil is deep enough to cover the bottom of the stick blender. Be sure to keep it on the bottom of the pot.
My pot is wider, so I get a lot of splashing too. I fixed the problem with a paper plate collar that I tape to the shaft of my stick blender. All splats of raw lye soap remain contained!
Heather, any reason you are not using coconut milk with the lye like for the other recipe, the bar soap??thank you
I found that it makes the instructions easier to follow. In order for beginning soapmakers to know the lye is ready they need to be able to see when it goes from cloudy to clear, and the coconut milk interferes with that.
I have used bentonite clay and it turned out fabulous. I also didn’t have enough olive oil, so I substituted with some castor oil and Shea butter to make up the weight.
Would this work as a cold process soap also?
Yes 🙂
I was watching if it would work as a cold procedure
Yes it can be made as a cold process soap.
Can I use aztec clay?
Yes, you can. It will yield a bar with slightly different qualities, but it will work 🙂
Heather,
I tried to send you an email regarding my purchase of you Organic Beauty recipes but not sure if I sent correctly or where I found an email address. Would you mind posting a way to contact you please? Thanks!!
Hi Michelle, you can email [email protected]
Can you skip using the lye??
Thank you,
Sharon ?
Hi, my name is Karen. Can I make this cp?
I was just wondering how long these bars last. i have read that a mostly coconut oil soap tends to be a softer soap. I also know that the longer you let them “cure” the harder they would be.
Any thoughts?
Hi Sarah, did you mean mostly olive oil soap? Yes, it does tend to be softer but some of that is balanced by the addition of coconut oil to this recipe. I’d say that if they’re dried well they should last at least a year. I’m not 100% on that, though, because we always use ours up before then 🙂
I hope to make several batches of soap for Christmas gifts, and this will definitely be one of them! Your coconut oil soap was my first (and favorite so far). I haven’t actually used a crockpot at all though. I’ve just reached trace and kept it on the stovetop on low for awhile, and let it cure well. Do you know of any reason not to do it this way, if it seems to work? We haven’t had any issues with lye remaining, as far as I know, and since there is also cold process soap I wonder if it’s fine and more about being mixed well and curing for a bit.
I know of a few other people that use that method . . . . seems fine to me 🙂
I was wondering if you had utensils just for soap making or if you just clean them well enough. I new to soap making and am excited about this recipe!
Hi Laura, that’s a great question. I do use most of the same equipment, but I there is a specific cleaning method that I use. I wrote all about it here: https://mommypotamus.com/making-soap-without-lye-and-other-myths/
Do you use a crockpot that is dedicated to soap making? Can I use my everyday one and wash it out and still use it for cooking?
Hi Lisa, that’s a really common question so I wrote a post about it. Hope you find it helpful! https://mommypotamus.com/making-soap-without-lye-and-other-myths/
Thank you for the tutorial. I haven’t made soap yet but I recently purchased almost everything I need for it. Just need to get some litmus test papers. I have the clay so am going to make this first.
The French green clay the you use has aluminum in it (14%), isn’t this a concern for you?
I’m new to soap making so that is something I’d like to know as well. I stopped using regular deodorant because of aluminum, I don’t want to add anything like that to my natural products.
I don’t personally think it is a concern. This article, though it refers to bentonite instead of sea clay, explains the general reason why: http://www.redmondclay.com/2012/what-about-the-aluminum-in-redmond-clay/
Hello! I just made the sea mud soap recipe and I did everything to the T but it seems as if the clay dried my oil infusion out. Did you mean to add teaspoons or is the tablespoons in the recipe correct? I made one batch with the 4 tablespoons and another with 2 tablespoons and the same outcome came for both batches. In the picture above it shows you having oil in the middle of the batch after the clay was added but mine didn’t do that with either batch I’ve made. Should I decrease the clay from tablespoons to teaspoons or add a luxury oil in with my eo’s? Help!?!?!
Hi Sheena, I used four tablespoons. Did you measure everything by weight?
Hi Heather!! Yes, everything was measured by weight. This was my first time using clay though. I measured out the tablespoons and put them into a container and weighed them as well to write everything down in my book by weight. I am going to try a different tablespoon my next batch to see if maybe the tablespoon I have is incorrect. I absolutely love your 100% coconut oil soap!! I’ve made tons of it and everyone that has tried it has fallen in love! Your blog is wonderful and I’m so happy I’ve found it!
mine also did not get oil in the middle. it is more dry than what was pictured. could it be the temp?
Is this pH a good option for dog shampoo?
Thanks!
I haven’t tested it by due to it’s alkalinity I wouldn’t think so.
My first ever at trying homemade soap and this one really appealed to me. So I made it and it turned out perfect! Absolutely beautiful! I’ve been a long time follower of yours. I trusted and felt very comfortable and confident with this recipe. Trust me, I’ve truly researched soap making because lye scared me! That all that was holding me back. I read this recipe out of at least 50 and am so very thankful for you and all your work. You share and educate at the same time, which made it very welcoming. Again, thank you <3
Sincerely,
Carla 🙂
Woohoo! I’m so glad it worked well for you, Carla!
Hi ma’am, I just am so happy! These projects I’m doing for the holiday season. My daughter is pregnant and loves the liquid soap recipe I made her from your site too. Makes her feel pampered ;-). Love your site and am always sharing. I’m very comfortable using your recipes, you’re honest and a lot of the other recipes I see out there aren’t always tried and true. But with yours, you always have the added touch of adding something special, whether it be a extra ingredient to make you feel special, which we all should to your antidotes to short stories. Again, I cannot say thank you enough. You’ve made this girl all giggady to make things again 🙂
Loving this recipe so much I want to play a bit with it. I want to add hemp or goats milk. I understand I replace the distilled water for theilks but would it work in this recipe being a crock pot method?
Just a recap on my playing with this recipe, I’ve added coconut milk, goats milk, argan oil, other EO’s I’ve even made a gardener scrub with this recipe. Again, they all turned out beautiful and sudsy most of all the perfect moisturizing bar of soap. Again, thank you for this recipe… And the best part, they’ll all be ready for the holidays. My pumpkin soap smells amazing 😉
hi carla! can you also share us your recipes? thanks!
Can I use a mixer instead of stick blender?
I would not use a mixer due to the risk of splashing, but a stainless steel or plastic spoon will work. It will just take longer to reach trace.
this may be a silly, but can you use this recipe for cold process soap making? Wasn’t sure if the ingredients need to be adjusted for a different method?
Thanks 🙂
Hi Rebekah, yes this recipe could be use for CP. 🙂
Hi!
this is my 3rd soap recipe of yours that i have made.
i love how helpful you are and the photos that you post are super helpful as well.
does this soap melt quickly when it is used? i observed that the coconut soap melted quickly once i used it; i have not let it cure more than a few days though.
thanks and God bless!!!
Hi, I have this recipe in the crock pot as I speak. This was my first time making soap and in the process of measuring out my oils I realized I didn’t have enough coconut oil on had to make it so I decided to half it…..not sure if the lye/water ratio is okay if i just half everything. Since I already had some EVOO measured out i just used that which was 11 oz and then made up the rest with coconut oil which was 4 oz. I thought as long as I have 15 oz of oil I’m good, does it matter what type of oil or can it just be a combination of oils to make up 15 oz? Then i heated the oils in a sauce pan on the stove on low and went out side to make my lye/water mixture. I came back in and the pan with the oil was popping….like it got too hot. I turned it as low as possible and added the lye mixture (after waiting approx 5 mins). It started to foam and bubble up to the top of the pan and sounded like a deep fryer after only adding like a TBSP or two. So I thought maybe the lye was still too hot, it was clear. Then I decided to pour the oil into a crockpot to see if that would work better. My crockpot was not warmed up so I was hoping it would cool the oils down. When pouring the oil mixture I noticed setiment on the bottom of the oil pan, like little clumps. I’m hoping this is not an issue. So now I turn the crockpot to low and add the lye and that went fine, no reaction at all from the liquid. Now I’m waiting patiently for it to cook and fold over and it is but only a tiny bit. It’s still at barely more than a trace. A very little bit foaming. Please help,,, if anything can I re use this batch in another attempt or is it a goner?
Hi Trisha, unfortunately it does matter what kind of oil is used. Different oils have different saponification values, and the amount of lye used has to be precisely calculated. I’m sure it must be very disappointing for your first attempt, but I’m afraid this batch is a goner.
I have only made cp soap, so this makes me want to try hp!
Oh wow, I’ve gotta try this. I always wanted to make green clay cleasing and detox soap but I have yet to do it. I’d do cold process of course.
Hi Heather,
For sea mud soap, can you use coconut oil to replace olive oil? Thanks.
Rachel
Hi Rachel, unfortunately that would yield a soap that is too soft. Thanks for your question. 🙂
Made this last night. Of course I forgot to add my EOs 0_o I wanted to add rosemary and ylang ylang…oh well I’ll just have to make another batch Thursday 🙂
I have a soapy q: after the oils/water traced I let the soap cook for 30 minutes. At about 20 minutes, I noticed that it appeared as if the oils and water had separated. Why did that happen? After another 1 hour, they recombined; however it took about 2.5 hours total for my soap to fully cook. Is this normal?
Helio Heather,
I have a question . .. can I use a cold press method for the recipes?
Can I use sea mud soap on face?
Hi, did you use wet french green clay?
No, I used powdered 🙂
Could I use a 6 quart crock pot for this or is it essential to use an 8 quart?
Unfortunately the soap will overflow in a 6 quart, sorry!
Would a roaster work to replace a crock pot! I am having difficulty finding an 8 quart one, or could I do two batches?
Can I use a roaster instead of a crock pot? If not can I use two 4 quart crock pots
Hi, I live in Brazil and I don’t find Lye in here. Could I replace it with glycerin? Would it work?
Unfortunately no, lye is necessary for the saponification process.
Maybe a silly question, but when using the bread loaf pan as your mold, how do you cut the soap to make it look best?
Ran out of time and had to mold the soap before the lye was completely converted. I’ve made cold process soap where the lye did its thing over time – can that work for this soap also?
Yes, it will 🙂
Hi:) I made this soap and I love it. My only question is about the name of the soap. I thought French Green Clay is different than Sea Mud Clay? Thank you!
Sweetie, what your directions describe seem to be “hot process” as it is quite different from the cold process I’ve been using the past 10 years. Or did I read it wrong?
Yes, I am using the hot process method. 🙂
Hi Heather I’m curious if you have this recipe and cold process steps?? Would I be able to use the same instructions – using the crock pot?? Thanks so much!
Where do you get your sea mud from? I see that the link no longer works. Thanks! Can’t wait to try this 🙂
I’m new to soap making but it seems like it always takes a lot longer for mine to fold over itself. I have this sea mud soap in the crock pot right now. I see it moving a little but it’s been in there for over an hour now & still has a puddle in the middle.
Any advice?
Thank you 🙂
Hi Heather!
Thank you for ur recipe!
Does the clay used makes the soap stain or leave any green residue??
Is this soap good for oily acne skin?
Thank you 🙂
I made this and I love it! Thanks for sharing!
Hi Heather
love this recipe. Appears to be about 20% superfat. Is that correct?
Hi Heather,
I would love to make a soap with moor mud, do you have any recipes or tips for that? Thanks so much in advance for your reply.
I don’t, sorry!
Hi Heather, I’ve been wanting to make Soap for a while now but it’s just not the right time for me so instead I bought some ground (pure) coconut soap and I’m hoping to be able to “melt” it and add other ingredients to make some soap bars (like your sea mud one) that way. Do you have any instructions for doing it that way?
Also, if I was to do it like this, do you know if it would be possible to add plain coconut oil during the process (after “melting” the ground soap) to increase the “superfat” content… Eg. If the ground soap is a 1% superfat can I just add coconut oil to it to make it closer to a 20% superfat soap bar??
Thanks for your help!!
Hi there,
How many lbs does this recipe make?
Thx,
Sophia
Hi Heather,
I’m a big fan and have made lots of your recipes and they always come out great. I decided to make this recipe cold process as that always seems to work better for me, and after I had put it in the mold and was all finished cleaning up, I did a stupid thing. I looked at my computer screen where I had another recipe on your site open and thought I had left out 1 oz of jojoba oil. I immediately gloved up again and scraped it back into a bowl and used my stick blender to blend in the oil I thought I left out. It was already really thick and had an unusual consistency at the end. Anyway, put it back in the mold and wanted to ask you if it’s worth letting it cure and trying it out, or should I just ditch the whole kit and caboodle. I would really appreciate your advice on this. Thank you.
Hi Rachel, I’m not totally sure how it would turn out but I would let it cure and see. My guess is that it will just be extra moisturizing. 🙂
Hello, I am pretty new to soap making, I’m just wondering why you heat the soap for 40 min to an hour? This is the only recipe I’ve seen that needs the warming /PH test. Is it because of the clay?
Also I would love to make different batches of scented soap for Christmas gifts, would you have a suggestion on how to do this or do I need to make several small soap recipes to do so? Pls send me your recipe if you suggest I make smaller batches. Thank you so much and love you blog. Thanks again.
Natasha
Hi Natasha, I used the hot process soapmaking method, which accelerates the conversion of oil/lye/water to soap so that it can be used immediately. You can make this same recipe without heating by allowing it to cure for weeks.
Hi, I’m wondering if you have any soap recipes that don’t include coconut oil? I have a high sensitivity to coconut and I’m trying to see if getting it out of my personal products makes a difference. It is very hard to find soap and shampoo with out any coconut oil.
I love making my own soaps but just realize that Castille soap has coconut oil in it.
Thank you!
Hi Heather. Would using a dehydrator speed up the curing process? If so, what temperature and length of time would you suggest? Thank you for sharing so many wonderful recipes that actually work.
Have you ever made this using the cold process method? I’ve been a cp maker for 15+ years and always look for new recipes. Olive oil and coconut I use in every batch and have tried more exotic carrier oils but never a clay. Love your site by the way, its a great reference.
I haven’t but I think it would probably work beautifully 🙂
Hi Heather,
does the dead sea mud work with the sea mud recipe instead of the french green clay?
thanks.
What oils can be substituted for the olive oil?
Hi, as a beginner soapmaker can you share with me why you would “cook” the recipe?
It accelerates the conversion of the ingredients into soap. Without heat the process takes about six weeks.