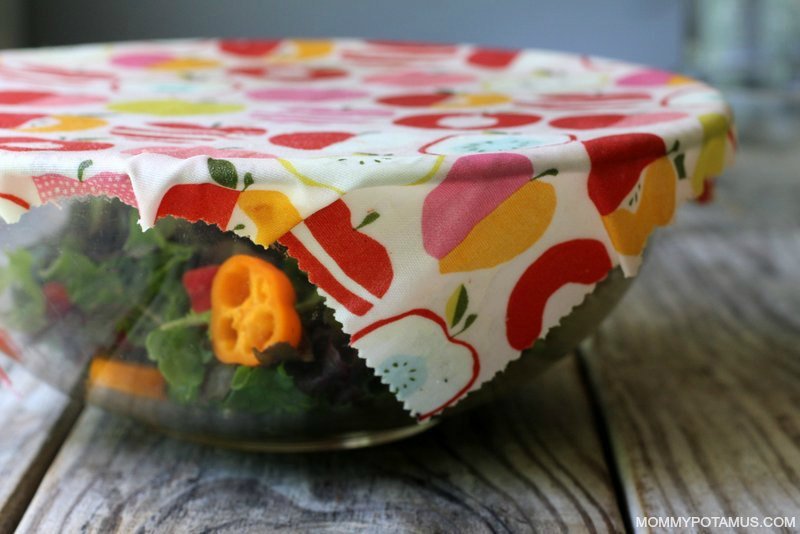
If you’re like me, there’s probably no love lost between you and plastic. Most food-related plastics – including cling wrap and so-called “BPA-free” containers – can “release chemicals that act like the sex hormone estrogen,” according to a study published in Environmental Health Perspectives. (1) (2) Fortunately, there are so many amazing alternatives available now. In this post I’ll share my simple method for how to make beeswax wraps, aka reusable food wrap.
What is reusable food wrap?
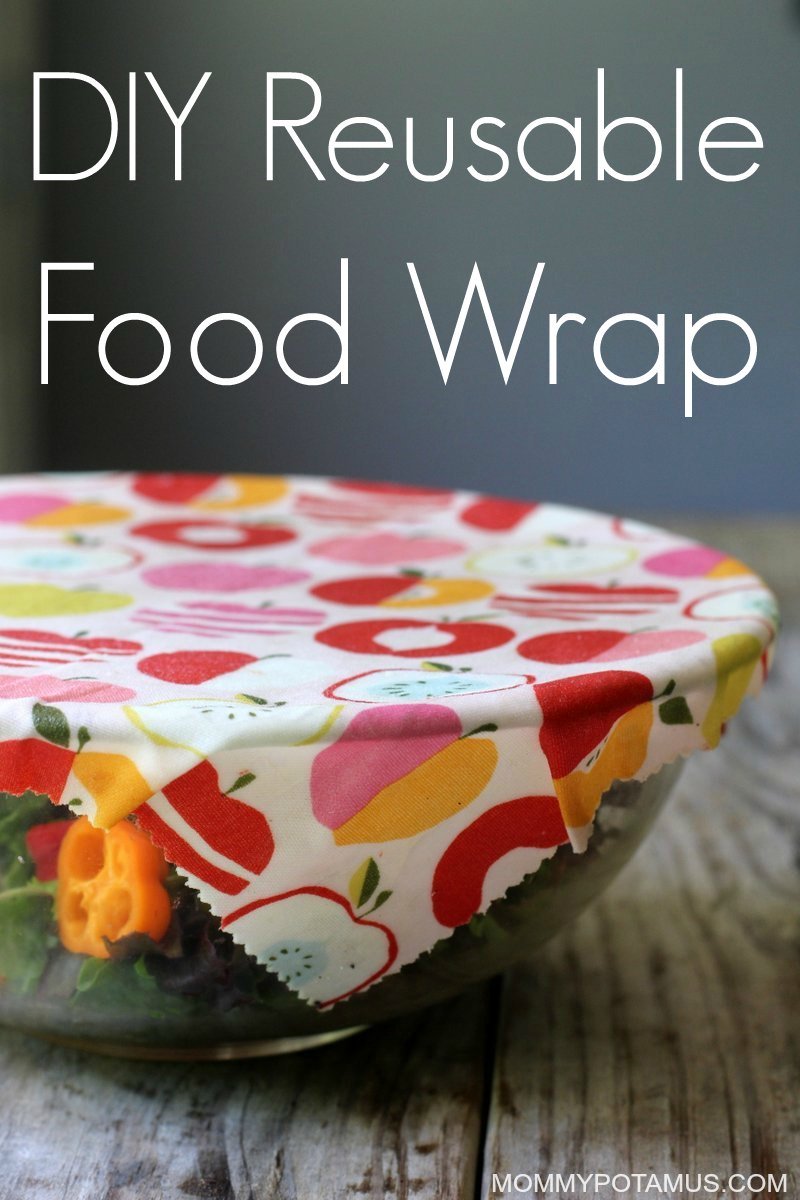
As I wrote in this review, beeswax food wraps are an eco-friendly, reusable alternative to plastic wrap that hugs bowls with just the right amount of cling. They’re saturated in a blend of beeswax, jojoba oil, and pine resin. The beeswax makes the wraps airtight and helps lock in moisture, while the jojoba oil adds flexibility and the pine resin adds cling.
Basically, the warmth of your hands makes them pliable so that you can use them:
- For wrapping snacks, fruit, veggies, cheese, bread and more
- In place of cling wrap over a bowl or other container
- As reusable snack bags/sandwich bags (You’ll find a tutorial for making them at the bottom of this article, or you can buy beeswax sandwich wraps here)
(Psst! If you’re grain-free and thinking sandwiches are a thing of the past, check out this real deal sandwich bread recipe.)
Why Beeswax Wrap is the BEES KNEES
- It’s made with non-toxic, compostable materials, making it good for us AND the planet
- Beeswax wraps can last a really long time, especially if you refresh them using the mixture below when they lose some of their cling.
So, why make a DIY version?
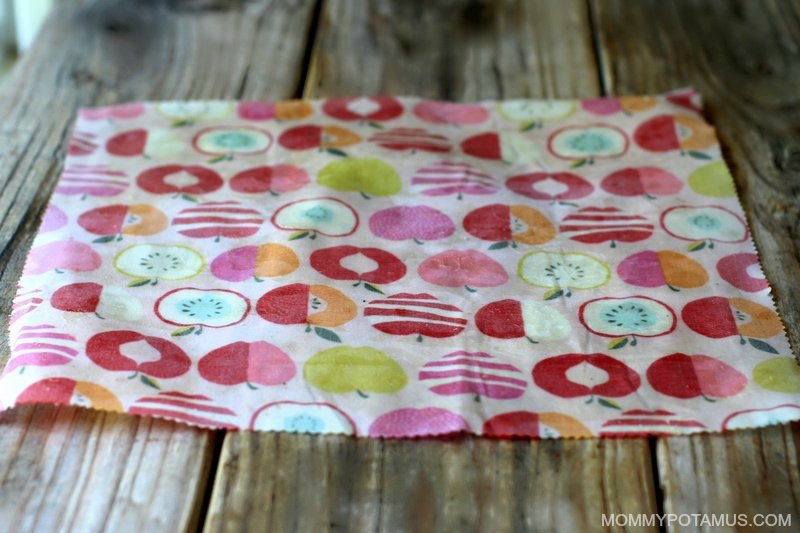
Bees Wrap is a great investment because it’s long lasting, but it is an investment. This DIY version is much more affordable, especially if you buy in bulk and have a make-and-take party with friends. You can also choose beautiful prints – the reusable wrap pictured is a lightweight organic cotton fabric from Monaluna that I got a great deal on. They have a lot of beautiful fabrics to choose from.
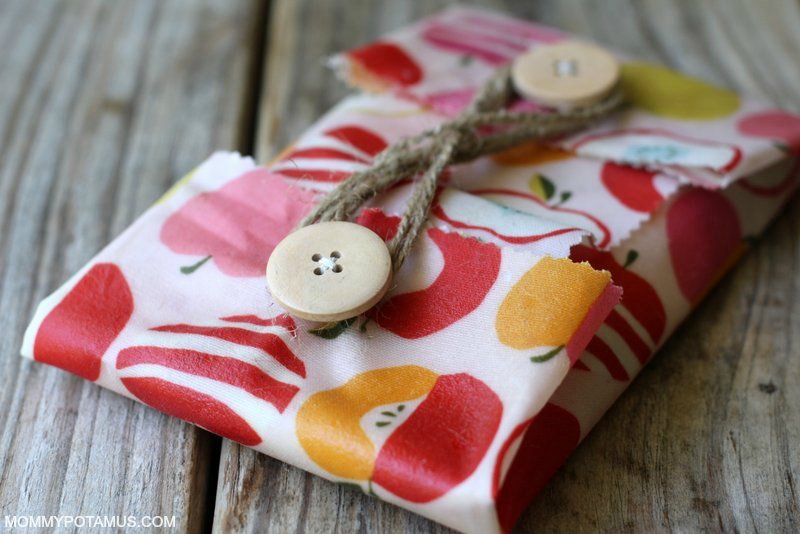
Oh, and if you can sew a button – which is just about the extent of my sewing skills – you can make reusable food wrap into these adorable snack bags. As I mentioned above, you’ll find a tutorial for them at the bottom of this page.
Is reusable food wrap difficult to care for?
Nope. Just wash them with cool water and mild dish soap, then allow to air dry.
Now, a few notes:
- They can be washed with cold water and a mild soap ( I use castile soap)
- Since they cannot be washed with hot water they are not recommended for meat
- Items like cheese, vegetables, fruits, nuts, sandwiches, etc. can be wrapped up. Items that contain a lot of moisture (like jello) should not be placed in snack bags
- Depending on how frequently they’re used, they can last for up to a year. After that all you need to so is re-wax them in order to keep using them.
Tip: If you’d rather not buy each ingredient individually, there is now a kit available that pre-blends the beeswax, pine rosin and jojoba oil for you in just the right amounts. It also includes coconut oil, which is not in my recipe, but I’ve heard it works really well.
DIY Reusable Food Wrap (How To Make Beeswax Wraps)
Equipment
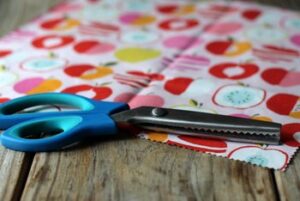
- scissors (pinking shears will prevent fraying)
- paintbrush (can only be used for this purpose)
- cheese grater
- baking sheet (I use this stainless steel one)
- thread, needle, string and buttons (optional- you'll only need these if you plan to make snack or sandwich bags)
- ruler or tape measure (optional)
- oven
- makeshift clothesline – binder clips make fantastic "clothes pins" if you don't have any on handmakeshift clothesline – binder clips make fantastic "clothes pins" if you don't have any on hand
Ingredients
How much beeswax, jojoba oil, and pine resin you need depends on the size and number of sheets you want to make. See the notes section below for my recommendations.
- organic beeswax pellets (See below for info on how much you'll needsee below for info on how much you'll need)
- powdered food grade pine rosin (Also called pine resin. This is what gives the wrap its "cling" factor – see below for info on how much you'll need)
- organic jojoba oil (See below for info on how much you'll need)
- 100% cotton fabric100% cotton fabric (Needs to be very thin, like a sheet. Organic cotton muslin will work, as will this cloth with pretty bee-inspired patterns)
Instructions
- Preheat your oven to 225F.
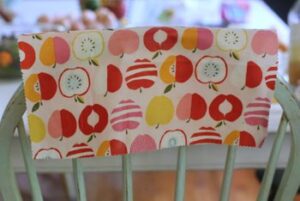
- Cut your fabric into the sizes you prefer. I wanted to have a small, medium, and large assortment, so I cut mine into 8×8, 11×11, and 14×14 inch squares.
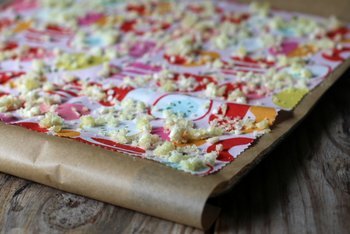
- Lay a piece of parchment paper over the baking sheet, then place your fabric on top. Sprinkle your beeswax/resin/jojoba oil mixture evenly over the top.

- Place the baking sheet in the oven and bake until the mixture is fully melted. This should take between 5-10 minutes, but can take longer.
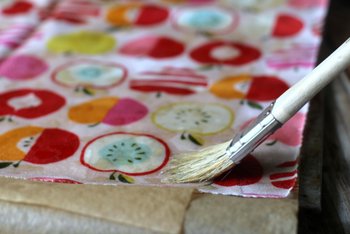
- Using the paintbrush, spread the beeswax mixture evenly over the fabric. In order to take this photo I took the sheet out of the oven, but usually I just pull the sheet slightly out of the oven, brush, and then pop it back in to let the mixture even out for another minute or so. Fyi, the mixture will adhere to the paintbrush just like it does with the cloth. I bought an inexpensive brush that I keep just for this purpose.

- When the mixture is evenly melted, remove the baking sheet from the oven and lift the sheet with tongs. I wave mine in the air to allow it to cool enough to touch (it doesn't take long it all) then hang it somewhere so that it can "set." This can be your laundry area if you have clothes pins in there. I just waved mine around until they were mostly cool, then hung them over the back of a chair to cure. You can also use a laundry drying rack if you have one, but you may want to place some parchment paper over the rungs before you place the beeswax wraps on them.
- Keep in mind that the wraps will feel very tacky at first. They mellow out fairly quickly. The end result will have grip but not be super sticky. Keep in mind that the wraps will feel very tacky at first. They mellow out fairly quickly. The end result will have grip but not be super sticky.


Notes
- 2 teaspoons grated, packed beeswax or beeswax pellets
- 2 teaspoons powdered pine rosin
- 1/2 teaspoon jojoba oil
- 1 tablespoon plus 1 teaspoon grated, packed beeswax or beeswax pellets
- 1 tablespoon plus 1 teaspoon powdered pine rosin
- 1 teaspoon jojoba oil
- 1 tablespoon plus 2.5 teaspoons grated, packed beeswax or beeswax pellets
- 1 tablespoon plus 2.5 teaspoons powdered pine rosin
- 2.5 teaspoons jojoba oil
How To Make Beeswax Wraps Into Reusable Snack Bags
Step 1: Start with a 14×14 inch piece of reusable food wrap
Step 2: Fold it into thirds

Step 3: Fold the top and bottom to create flaps

Step 4: Unfold the fabric and sew on buttons as shown below
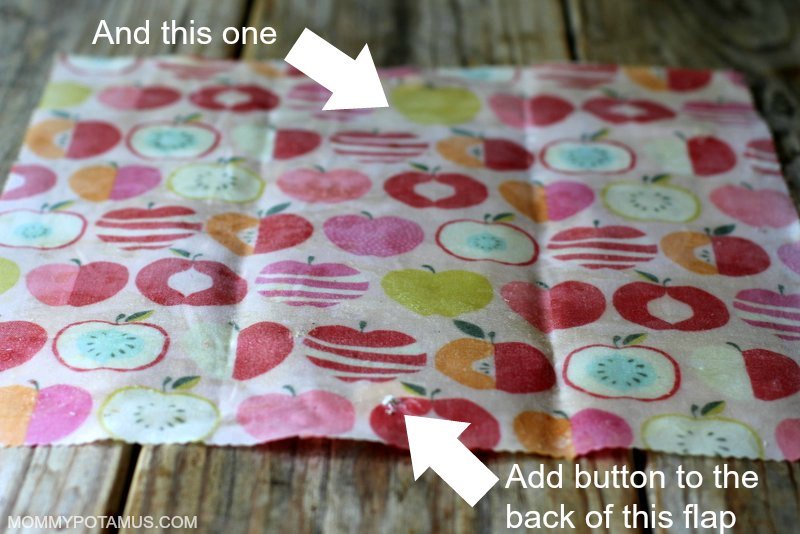
Step 6: Re-fold into thirds, then fold over the flaps and attach a string to one of the buttons
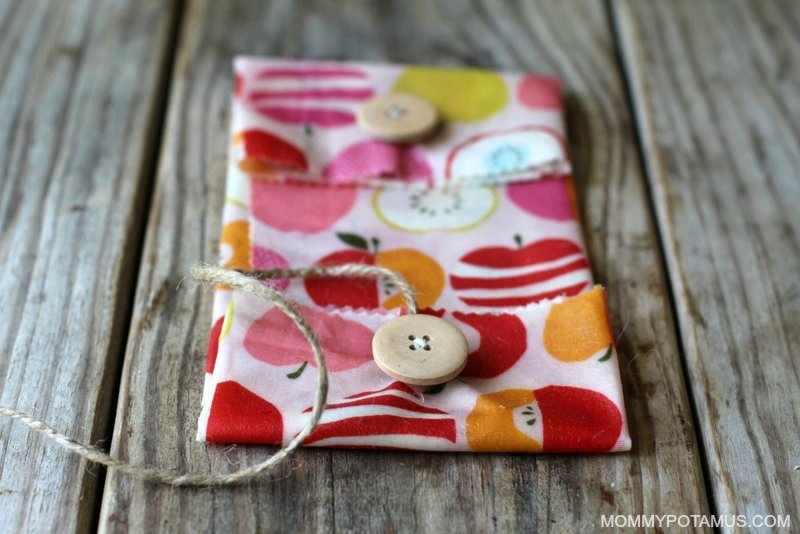
To close the snack bag, just wrap the string around both buttons in a figure eight pattern.
Frequently Asked Questions
Since I first published this tutorial I’ve received a lot of similar questions, so I’ve updated it with answers to the most common ones.
Tea tree essential oil is very different from a sticky tree resin and is not suitable for this DIY. Other resins such as frankincense may work, but I haven’t tried them so I can’t say for sure.
Yes. They can be hand washed in cool water and mild soap, then air dried.
How long they retain their cling will depend on how often they are used. My typically last about six months to a year. After that, they can be re-waxed and used again.
Yep! Here are a couple of options I recommend:
Bees Wrap Set (assorted sizes)
Beeswax Sandwich Wraps
Just one. It will saturate the cloth and cover both sides.
It is very tacky at first but will mellow out in a few days. They can sometimes take a few days to cure, or sometimes longer in high humidity environments.
Tree resin has a higher melting point than beeswax, so if everything else is melted and it’s still clumpy it may just need a little longer to melt.
Kristie shares this tip in the comments below:
“I just made a batch of these. The wax was a bit unevenly distributed, so I layered all 10 or so wraps in a stack, rolled them up somewhat tightly and put them in a 200 degree oven for about 3 hours. When they came out the wax had dispersed evenly throughout! It worked wonderfully!”
Other commenters have mentioned using an iron to spread the wax mixture evenly. Sara describes this method:
“I use an iron covered with foil. Place the cloth with wax and resin on top on a sheet of parchment paper. Cover with another piece of parchment. Iron on cotton setting with no steam until wax melts. The foil on the iron help protect it from getting wax on it. Protect your ironing board cover by covering it with an old towel or with more parchment paper.”
Some commenters have reported doing that and it seems to have worked well.
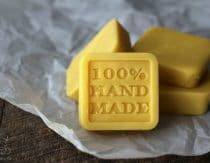
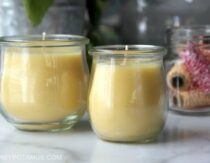
More Beeswax Projects
Beeswax candles – Making beeswax candles is SO. MUCH. EASIER. than you probably think! It’s little more than a melt-and-pour process, and in my step-by-step tutorial I show you how.
Lotion bars – These homemade lotion bars soften and protect skin through the dry fall/winter months, and they also work well as a summertime after-sun soother. They’re super easy to make, and make beautiful gifts, too!
Ever tried to make your own wraps like these? What other DIY projects do you love?
Want non-toxic cleaning recipes that WORK?
I’ve created a free ebook for you as a gift for signing up for my newsletter. 7 Non-Toxic Cleaning Recipes That Really Work covers seven recipes that you can make in just a few minutes each for squeaky clean windows, sparkling dinnerware, lemon-fresh countertops, and more. Subscribe to my weekly newsletter and you’ll be redirected to a download page for immediate access to this PDF ebook.