
What’s 6,000+ years old, known all around the world
. . . and directly tied to your cerebral cortex? Why aromatherapy, of course. The first documented form of aromatherapy comes from ancient Egypt, where aromatic plants were infused into oil to produce perfumes and medicine. (source)
As we talked about in my post about how to make diffuser necklaces, smells are not only linked to our cerebral cortex (which controls higher functions like cognitive performance, learning, and focus), but also to our limbic system. The limbic system is the intuitive part of our brain that holds our emotions and memories, which is why we can pick up a box of Crayola crayons and instantly be transported back to childhood.
Because of their ability to motivate and inspire us, stores often pipe in fragrances to put us in the mood to buy things. While I’m not a huge fan of that approach, especially considering how toxic synthetic fragrances are, I’m more than happy to use essential oils to motivate and inspire myself, help calm my children, and support health.
In this post I’m going to show you how to make a diffuser bracelet so that you can carry the benefits of essential oils wherever you go. But first, you’re probably wondering . . .
How do I use a diffuser bracelet?
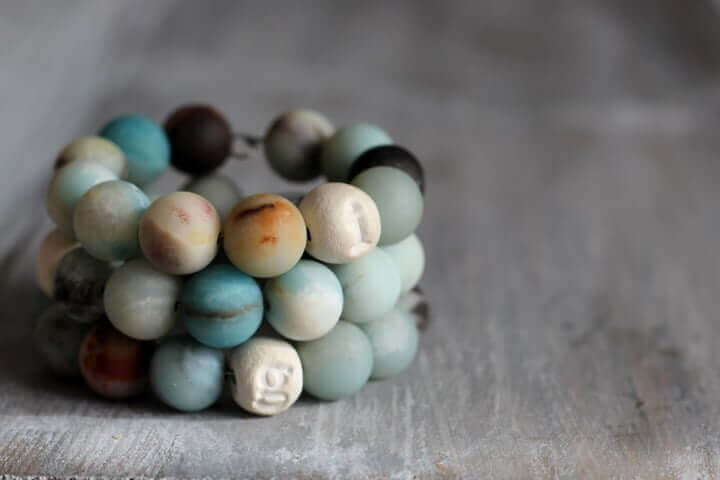
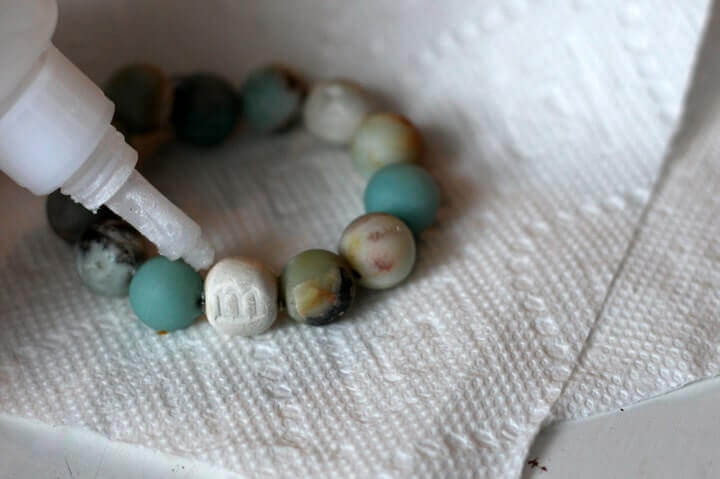
To use your bracelet, place a small amount of essential oil on 1-3 of the clay beads. Make sure to apply the oil on the part of the bead that faces away from your skin. Because essential oils are very concentrated, it’s best to avoid applying them directly to skin undiluted except in very specific situations. For example, lavender can sometimes be helpful when applied neat to a small, minor burn.
Here’s my method: I place one drop of essential oil on a plate and dip the outside of each clay bead in it. When the smell fades I add more essential oil to the bracelet. Some oils have quite a bit of staying power and can last for several days, while others will fade more quickly.
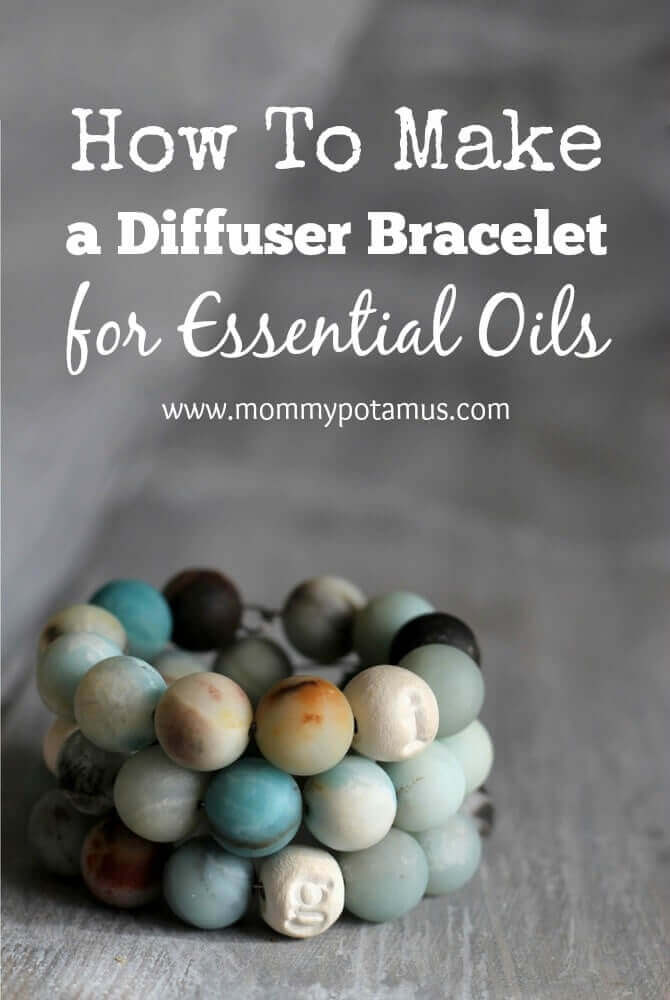
How To Make A Diffuser Bracelet For Essential Oils
Supplies
- Air dry clay in the color of your choice – Find terra cotta here and white clay here
- Decorative beads ( I used these Amazonite stone beads in the 14 mm size. They come in 15 inch strands.)
- Small stamps (Optional – I used some alphabet letter stamps to add initials to my bracelets)
- Memory coil (use the thickest possible coil that will fit through your beads)
- Needle-nose pliers for jewelry (Mine are similar to this and worked fine, but these would work even better)
- Wire cutters (like these)
- Glue (Superglue or hot glue would work. Even clear Elmer’s might work)
- Wax paper
- Toothpicks or skewers (Optional, only needed if you are making beads)
Directions

Take a pinch of clay and roll it into a ball that is about the same size as your other beads.
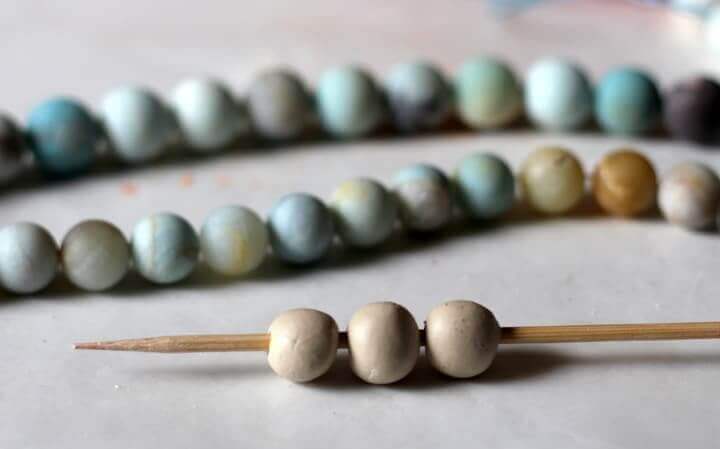
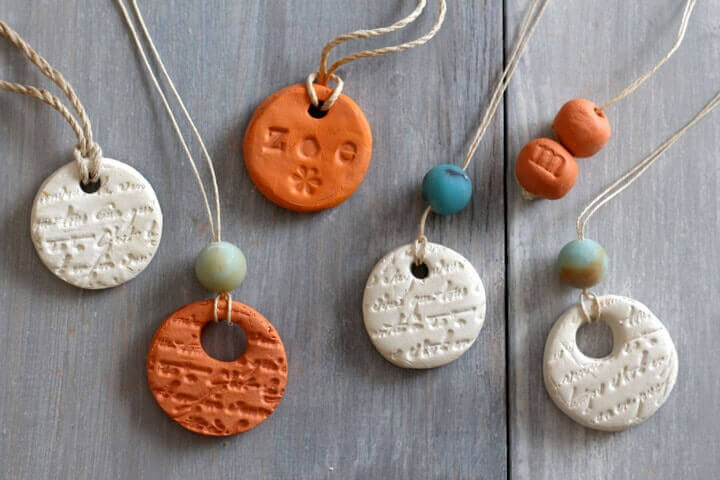
Using a toothpick or wooden skewer, poke a hole through the center of the bead. If desired, press gently with stamps to add design. I used some alphabet letters to add initials to the beads. Allow beads to dry for 24 – 48 hours.
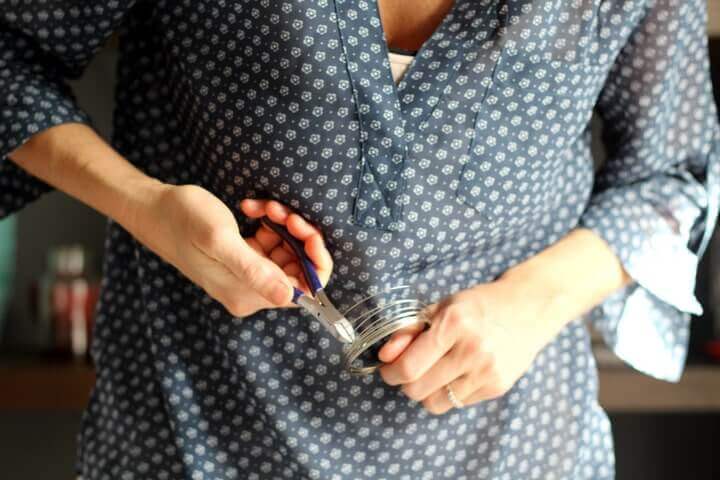
Measure your wrist (or guesstimate wrist size if this is a gift). Then use the wire cutters to trim off a piece of memory coil for your bracelet. Make it a little longer than you think you need because the beads will slightly reduce the overall circumference of the inside of the bracelet.
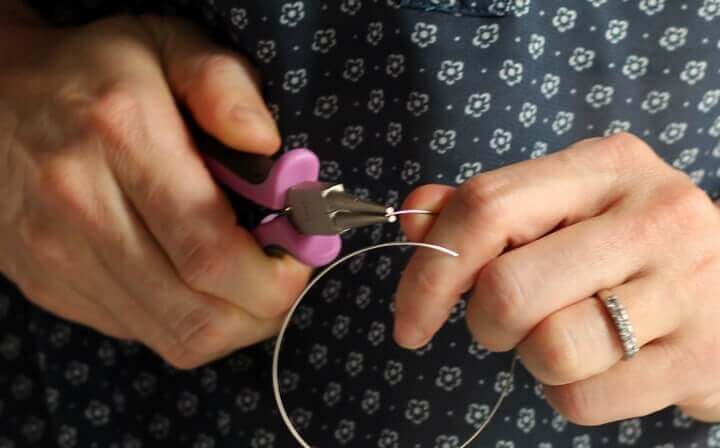
Now grab your needle-nose pliers and use the very tip of the plier to grab the very tip of the memory coil.
Next, curl the coil into a small circle/oval.
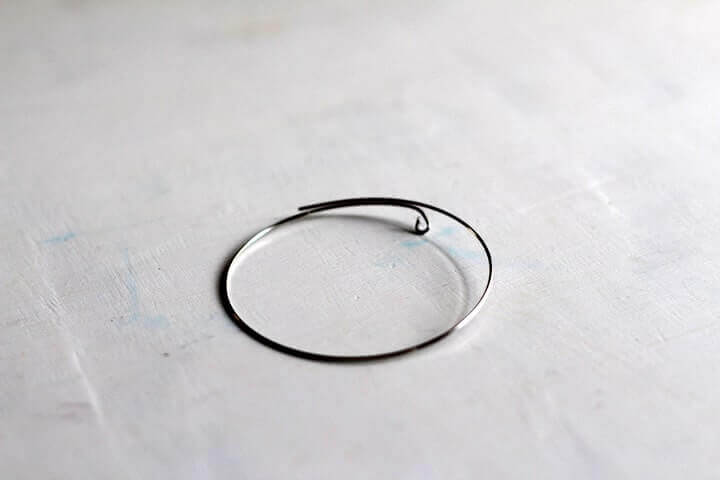
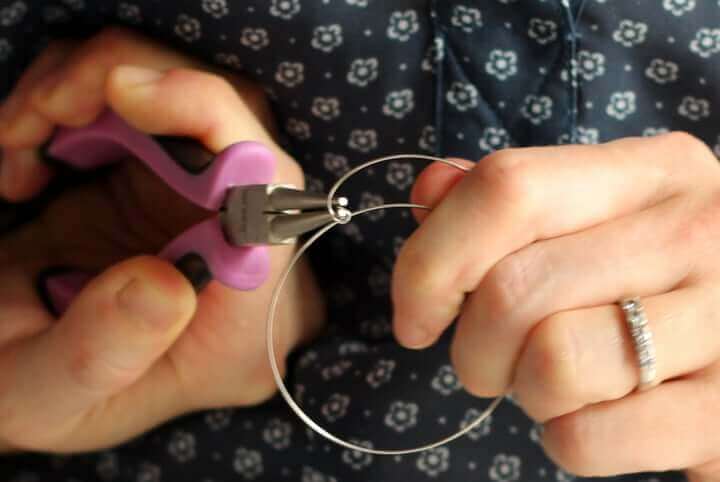
This is what it should look like when you’re done.
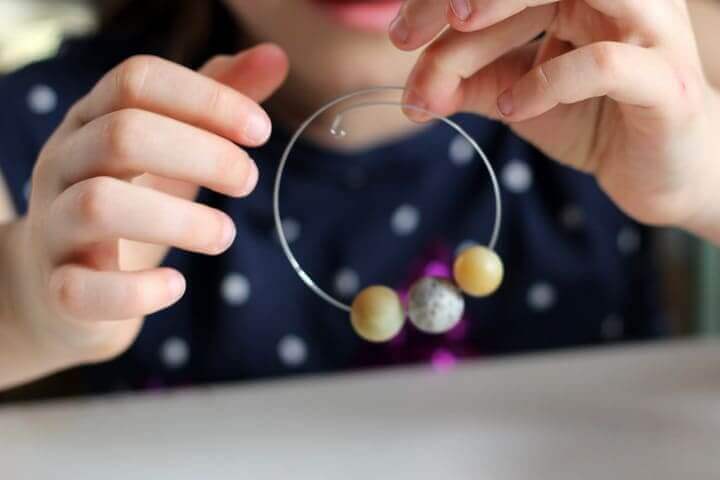
String on your beads, adding the clay beads throughout.
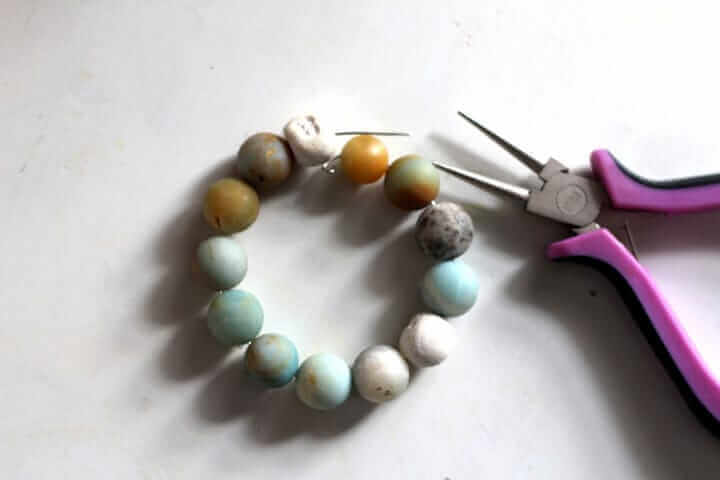
When all your beads have been added your bracelet should look something like this. Now use your needle-nose pliers to create a hook to go through the loop. For a bracelet situated like the one in the photo above, you’ll want to bend the wire down toward the table so that the loop easily and naturally slides through the loop.
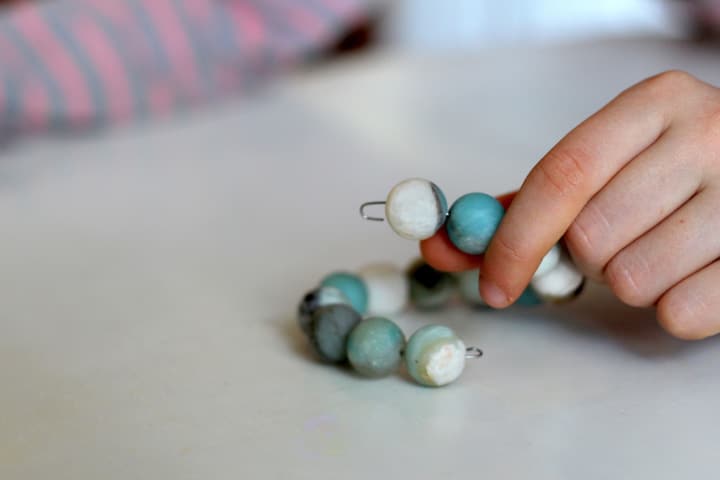
The first time I made these bracelets the memory wire was so thick that they held the beads in place when worn. However, the second set rolled around a little, so I placed a dab of glue between the clay beads and the beads that surround them. To make the glue discreet, I applied it toward the inside of the bracelet where the beads touch. The glue prevents the beads from rolling around when worn. Elmer’s clear glue might work, but we make our own craft glue so I didn’t have any on hand to test with. We keep superglue for emergencies, so that’s what I used.
Care Instructions
Do not allow bracelet to come into contact with water.


Hello.
At what point do you paint the beads, and with what kind if paint.
Also, at what point do you add the essential oils.
Hi Kresta, the colored beads are actually not painted, though I wish I had that kind of talent! They’re made from Amazonite stone, and I mixed them in with the clay beads to make the bracelet more interesting.
With regard to adding essential oils, I place one drop on a plate and dip the outside of each clay bead in it. When the smell fades I add more essential oil to the bracelet. Some oils have quite a bit of staying power and can last for several days, while others will fade more quickly.
If u want to colour the clay, u can usually add a few drops of food colouring or acrylic paint to the clay, then just mush the clay around til it mixes in – I’m not sure if ALL air dry clay is suitable for this, so check the label first 🙂
Where do I find beads at ? What store
This was asked a year ago but you can find Amazonite beads at Joann’s or Michael’s. I am not sure if they are as large as the ones in her design though. Otherwise check out online bead stores. You’ll find plenty of places,. Even eBay has good options, if you buy from reputable storefronts.
can I use sculpey or primo clay
Polymer clays won’t absorb the oil, so don’t bother with them for the ones you want to scent.
Where do the essential oils come in? Do you soak homemade beads in them?
That’s a great question. I don’t soak them, but I add a small amount to the outside of the bead (the part that doesn’t touch my skin). You can find detailed info in the “How do I use a diffuser bracelet?” section.
Love this idea! Would it be better to drop EO inside the hole of the clay beads? Beads spin around easily and even dropping the oil on a side not facing your skin, it seems it will come in contact with your skin anyway. Just a suggestion
I tried that but I found that there just wasn’t enough surface area inside the bead to absorb an entire drop. Plus it was difficult to apply because of both the size and placement of the holes.
The beads on the first bracelets I made didn’t roll because the gauge of the wire was very thick and the beads were very snug when threaded on. However, with my second set I used slightly lighter gauge coil (because the other was not available) and the beads rolled. I settled on applying a dab of superglue toward the inside of the bracelet where the beads touch. The glue prevents the beads from rolling around when worn.
As someone else mentioned, u can also purchase flat memory wire – just make appropriate holes in the bead with a scrap niece of the wire – this would solve the problem without using glue. It’s readily available on sites like Etsy and probably Amazon etc. too
NB: flat mem wire is usually more expensive
Hi Heather!
I love the idea of a diffuser bracelet! I recently purchased the items to make your diffuser necklace and can’t wait until they arrive. I was perusing the comments of the Crayola white clay you linked and there were some negative comments saying it breaks easily. One person said they preferred salt dough over the clay and I wondered if salt dough would work with essential oils. What do you think??
DoTerra had a post awhile back about using salt dough to make diffuser ornaments so I bet it would be fine.
Lesley, I think salt dough would probably work, although I don’t think it is necessarily more durable than this clay. The most important thing is to make sure your pendant is on the thicker side – about 1/4 inch.
Salt dough is fine for school art projects, but if you live in a semi-humid environment, the salt dough can absorb moisture from the air and “re-hydrate”…then it will no longer be a bead.
My experience: we had hung salt dough Christmas ornaments one year and were awakened to the sound of /rustle-plop/ two nights later. The ornaments were not new–we had made them when my daughter was in kindergarten and used them every year–she was in 9th grade that year. It was our first Christmas in Houston… I learned later, from another Houston mom that the only way to keep salt dough from absorbing the humidity was to cover it in shellac or another water-tight type paint. Unfortunately, that would make the beads unusable for oils.
Perhaps a silly question but when wearing the bracelet won’t the beads spin around thus likely having the application spot directly coming in contact with the skin? I’ve never used a product like this before so just wondering… Love your site!! 😀
That’s a great question, Carrie. I found that my beads pretty much stayed put when I wore the bracelet 🙂
She glued the beads in place so that they don’t spin around while wearing.
“I placed a dab of glue between the clay beads and the beads that surround them. To make the glue discreet, I applied it toward the inside of the bracelet where the beads touch. The glue prevents the beads from rolling around when worn.”
Not a silly question at all! If your wire is thin and the holes in the beads are wide they could definitely spin a lot. The holes in these beads are relatively thin and I used the widest gauge I could find to make them fit on snugly, but even then I had to apply a dab of superglue toward the inside of the bracelet where the beads touch to keep them in place.
What size wire do you use?
I have the same questions
Can I ask what stamp kit you used and where you got it?
Thanks in advance!
I think the letters came from Michaels 🙂
The beads are beautiful. Can you describe how you went about coloring them?
She bought the colored beads. The link is provided in the post. The only made a few to personalize it, the one’s with the stamped initials.
Love this, what a great gift idea!!
In the directions it says what beads she bought, with an amazon link, and then you only make three beads out of clay.
How many beads per bracelet? We are going to do a ladies night and want to order a bunch of beads.
I’m not sure how many beads are on each strand, but the strands are 15 inches long. Since the amount of beads needed will vary based on wrist size, I suggest asking for measurements before ordering 🙂
An option for the beads: when making them, create them around the wire so that they dry on the wire. It will prevent them from moving around so much. There will be a little shrinkage when drying but this will help them to not move around. I really love this idea. Thanks!!
Hi,
Do you have a picture with the bracelet on? I would like to see how it looks on.
Thanks,
Lindsey
I’m curious, what wire gauge (size) did you use?
I’m curious–will any unglazed clay beads work if I don’t want to make my own? Also, would you know if there are other mediums that will hold the scent as well, such as wood? I don’t work much with clay & ceramics.
Hi Dee, my guess is that any unglazed clay bead would work. Other have used wood as well, but I haven’t looked into what the details on that entail. This is my first experiment with clay, so we’re learning together 🙂
Silly question, how do you clean the charcoal or clay beads if you want to change aromas?
The aroma will fade after awhile. There’s not really a way to speed that process up unless you want to place the bracelet in a powder to draw out the oil. 🙂
i want to make this bracelet.
Do you sell you’re bracelets!
Dawna Osborne
Hi Dawna! No, I don’t sell bracelets. So glad you like the tutorial!
you could have the beads bisk fired as well they would still be porous and obsorb the oils. And you could use different clays and/or under glazes to color them then you could really make them interesting they would still take the oils and last a lot longer
Can you buy clay beads that will absorb the oils or an entire bracelet?
The bracelet is so pretty! However, as a Certified Aromatherapist I must caution against wearing undiluted essential oils against the skin; at the very least, it greatly increases the likelihood of developing a skin sensitivity, and can cause a burning sensation, a rash, all sorts of uncomfortable reactions. To compound matters, this design in particular would press the oils against the skin with prolonged contact, increasing exposure. If you would like to safely wear essential oils, first dilute in a carrier oil (such as sweet almond oil, coconut oil, olive oil, etc.), one or two drops essential oil to a teaspoon of carrier oil, and dip your beads in that. OH, and a tip about working with memory wire – if you hold a flame to the ends of the wire and heat it until it glows, the “memory” of the wire in the area that has been heated is disabled and it becomes much easier to create a hook and loop. Just be sure to allow the wire to cool before touching it, either by quenching or by simply waiting a few minutes.
Heather took care to avoid the skin/essential oils contact by gluing the beads in place and putting essential oils on the outside of the bead, the side that would not be in contact with skin. See above comments.
“To use your bracelet, place a small amount of essential oil on 1-3 of the clay beads. Make sure to apply the oil on the part of the bead that faces away from your skin. Because essential oils are very concentrated, it’s best to avoid applying them directly to skin undiluted except in very specific situations. For example, lavender can sometimes be helpful when applied neat to a small, minor burn.
Here’s my method: I place one drop of essential oil on a plate and dip the outside of each clay bead in it. When the smell fades I add more essential oil to the bracelet. Some oils have quite a bit of staying power and can last for several days, while others will fade more quickly.”
They do also make memory wire that is wide and flat like ribbon. cut a piece long enough to use through the center of the beads instead of a round skewer. Beads guaranteed not to spin and no glue required and there are different gages of width available so round holed beads can still fit! This makes a wonderful gift!!! I use and eyedropper for saturating beads! Just be careful whom ever you are gifting is not allergic!! Also, “salt dough” has its own scent sometimes that can effect the scent of your oil and it will dry out and break!
Great suggestion to use the flat wire!! Thanks!
This is a very cool portable diffusing option! I would have never thought to use oils in a form of jewelry! I plan to create one of these soon!
These are very pretty. I would love to make them as gifts. Can you tell me exactly what wire you are using? When I looked up wire on Amazon it became very confusing very fast. It appears there is a ton of different gauges but also quality.
Yes! I too would like to know the exact specifications of the wire that you had used that worked perfectly with those beads (the one that went out of stock). thanks in advance!
Just wondering if the Amazonite beads absorb and oil too, or if you just put the oil on your clay beads.
is there somewhere I can purchase the bracelet already done? Thanks
Loann, there are several sites where you can buy diffuser bracelets and other jewelry online. Just search “diffuser bracelet” or “diffuser jewelry”.
I loved this!! I will be making these for sure. I was reading the other comments and saw that a lot of them said that the beads will turn and the side with the oils with touch your skin. I was wondering if it’s bad for the oils to touch the skin, because I thought they were good for your health and not dangerous.
Also, would it be silly to try it with cording instead of the metal? Unfortunately, I am allergic to some metals and it creates discomfort.
Thank you!!
Depending on which oils you use, will determine if safe or dangerous. With the size of the beads there shouldn’t be much metal touching your skin, I too tend to react to metals, but am in the process of making one today. 🙂 My clay beads are drying.
I ordered the recommended beads and they are bigger than I expected and were to heavy for the memory wire I got. I am going to have to come up with another idea to be able to wear it. I super love the beads, the idea everything. And the holes in the beads are small. So using a bigger gauge wire would have not worked. The beads are stone as well so you can change the hole size. Is there a stronger memory without being a bigger gauge would be a good thing to find
The larger the gauge, the smaller the wire.
My favorite size beads for bracelets are 6mm, 8mm and 10mm. The 14mm are very large, I work with gemstone beads, so I know they are a bit heavy. I would recommend you try the 8mm or 10mm size beads, you will be able to still find them in Amazonite stone – it’s a very common gemstone for jewelry making. Also keep in mind that higher guage wire = smaller diameter, while lower guage wire = bigger diameter, so 14 guage will be much, much larger around than 20 guage, for example. Also, just thought I’d let you know, a lot of people use wooden beads or lava rock beads for EOs instead/also. Hope that helps you.
I love this idea, do you think polymer clay would work too? Then you could add all sorts of colors and marbelize it to replicate stones/marble.
Also, what about that clear elastic stringing method?
The EOs will melt the elastic. Avoid plastic materials with oils.
This is a really lovely idea. I may have to buy some air dry clay and give it a try
This is a wonderful idea and I will be using it for my children going back to school. Both of them have asthma and we treat their general symptoms with Eucalyptus oil, Peppermint oil and Lavender oil in a diffusor. This will be wonderful for school when allergens get the best of them… Thanks again so much!!!
I read not only the posts but the comments as well, and I must thank the writer as well as Linda for the precaution she asked us to take.
hello,
i am not crafty, but would love to buy one? is that possible? thanks!
My daughter works with fragrance oils to make air fresheners etc. will those work as well as the essential oils?
I would NOT use fragrance oils therapeutically like this, no. There are a lot of chemical additives in them, generally.
Hi Heather, thank you for this helpful post, it is by far the easiest guide I found online. However, I didn’t follow your guide to make some best essential oil diffuser bracelets but rather hair slides and bands. OMG, my husband keeps sniffing my hair <3.
Haha, I’d love to see them! If you’re so inclined please send a pic to [email protected]
Such a crafty post! I will definitely share this with the rest of my colleagues. I’ve noticed that essential oil jewelry has been a big fad as of lately. This is the first DIY guide I have seen for EO bracelets, most of the ones that I have noticed are for necklaces. Thanks for sharing Heather.
I’ve heard you can use coconut beads or beads made out of volcanic lava and that they hold the essential oils for quite a few days! I love the idea of making your own beads and using the letter stamp. Gonna make some! Thanks for the idea. I love your website!
Hello. I have gone through instructions and comments, hoping to find what the wax paper is used for. No mention. Could you kindly advise me what it is used for. Thank you kindly.
Hi! This looks like a great idea and something I want to buy for my sister; is there anywhere where I can buy them, premade? I’m a full time student, wife, and employee so I don’t have time to make one myself haha!
Those look really cool. How long do you think it took you to make them?
CAUTION!!! PLEASE TAKE CARE NOT TO USE BERGAMOTT OIL! Although it smells wonderful if you get any on your skin and go into the sun you will burn badly. Research your oils carefully.
How do you keep the bead clean? And if you want to put a different oil? Or should just do multiple bracelets for different oils?
Wow, read ever comment. Can you clarify the difference of a 8 mm raw wood bead and handmade clay bes
Hello I love your post, could you please recommended what size or brand of wire you used?
Thank you!
Melissa
I wish I could check for you but I moved recently and the wire is packed away – so sorry!
does essential oil jewelry help with health issues like blood pressure,diabetes,cholesterol and others
What size (gauge) wore did you use?
Thank you for sharing that detail.It was fascinating and insightful. Continue to share useful resources over these blogs…
Hi, really loved the tutorial. I was wondering what is the best way to store these bracelets? Thank you.
A soft cloth bag or piece of fabric would be great, although sometimes I just store mine in a small jewelry bowl.
Excellent idea. Thanks for the step by step instructions.