
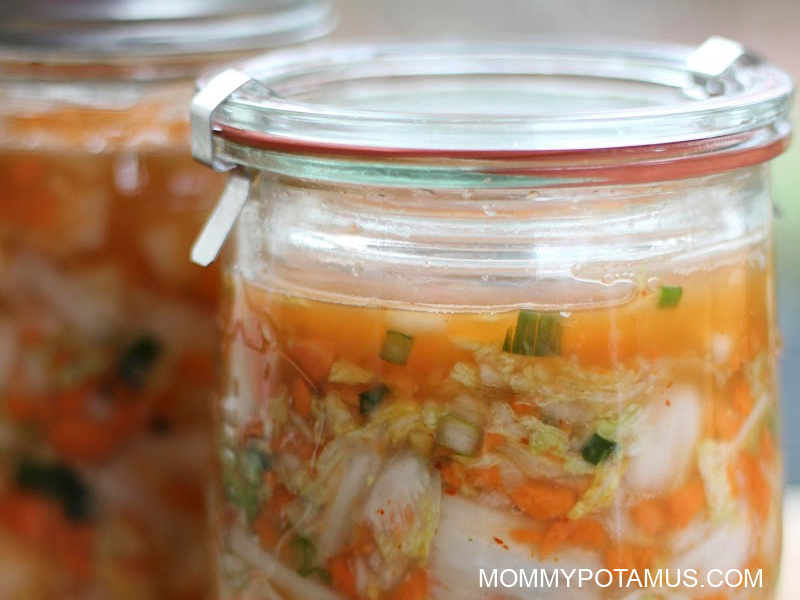
Note from Heather: Today’s guest post comes from Carolyn Erickson, a Weston A. Price chapter co-leader and blogger. Thank you for sharing your recipe with us, Carolyn!
As I ventured into traditional foods a few years ago, I happily experimented with the introductory basics such as homemade chicken broth, cultured yogurt, and basic lactofermented sauerkraut. These were flavors that I already knew and loved … although preparing the foods in my own kitchen made them even more delicious to me!
But my first encounter with fermented Korean kimchi was more of an eye-opener. Wow, the colors were vibrant and the taste was so much more intense and peppery. I quickly grew to love this slightly pungent traditional fermented food.
These days, every new batch of kimchi that I prepare is slightly different from any other. Sometimes I include more of the hot daikon radish, sometimes more spicy chili powder. Cilantro is a nice addition. There are so many possibilities!
For your first venture into the exotic flavors of Korean cuisine, here is a simple recipe loaded with iconic kimchi flavor and those powerful probiotics.
Tips for Making Good Kimchi
- I prefer to purchase organic produce when possible.
- Traditionally-prepared Kimchi sometimes includes a small amount of seafood such as shrimp or oysters. Instead, my recipe relies on a little bit of fish sauce to provide that awesome umami flavor.
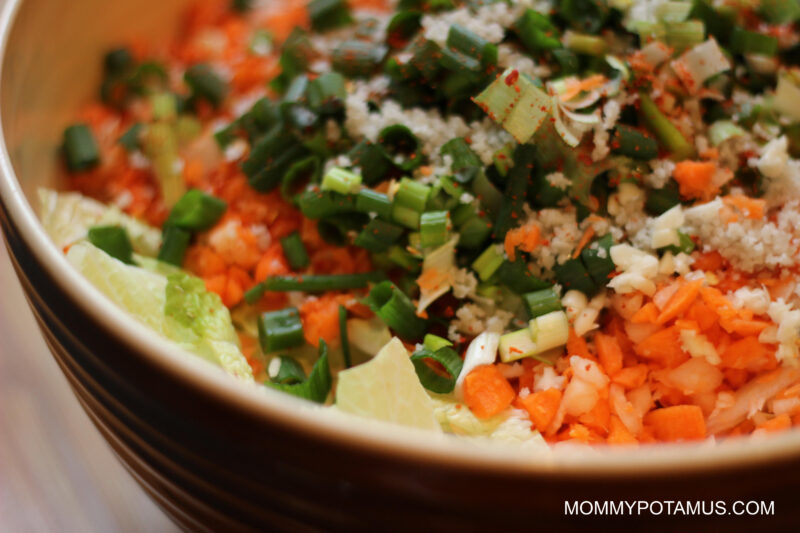
If you follow these tips, you’ll have a tasty and healthy side dish to share with family and friends!
Simple Kimchi Recipe
Equipment
- quart-size mason jars or Weck jars
- glass fermenting weights
- lids with airlocks (optional, you can also use regular lids and burp the jars)
Ingredients
- 1 large napa cabbage*
- 2 tbsp sea salt
- 1 bunch green onions (cut into ½ inch pieces)
- 3 medium carrots (peeled and grated)
- 1 small small daikon radish (peeled and grated)
- 4 cloves garlic (minced)
- 2 inch fresh ginger (peeled and minced or grated)
- 1 tsp fish sauce (I like Red Boat brand)
- 1 tsp crushed red chili pepper (I like Frontier brand)
Instructions
- Remove one of the outer leaves of the Napa cabbage and set aside.
- Core the cabbage and cut into approximately 2-inch by 2-inch pieces.
- Place cabbage pieces in a large bowl, sprinkle salt on the leaves, then toss to mix.
- Set aside and allow to rest 30 minutes so the salt can pull moisture from the cabbage.
- While the cabbage is resting, mince the green onion, peel and grate the carrots and daikon radish, and peel and mince the garlic and ginger.
- After the 30 minutes are up, use a wooden pounder or clean hands to gently mash the cabbage leaves to further release juices.
- Add the remaining vegetables, the fish sauce, and the red pepper flakes to the bowl of cabbage and mix.
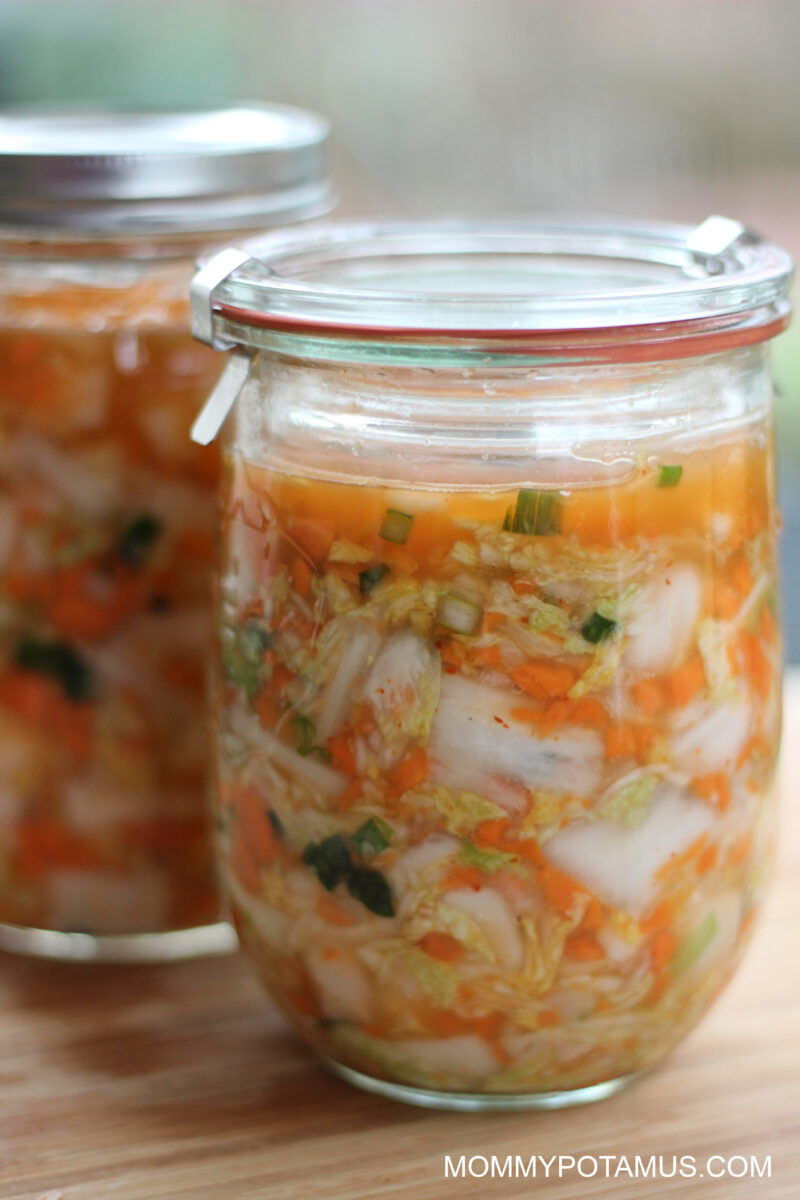
- Transfer the kimchi mixture to a sterilized quart-sized wide-mouth jar, pressing down as you pack the jar so that more brine juices are released. Your goal is to fill the jar just up to 1-inch below the lip, allowing space for expansion.
- Fold the reserved outer leaf of the cabbage to fit on top of the kimchi mixture and press it down so that the brine covers the leaf.
- Top with a glass fermenting weight to keep the mixture below the brine.
- If you need more liquid to cover the cabbage, simply add a little filtered water so that the brine is above the kimchi ingredients
- Seal the jar, place it out of direct light, and allow it to ferment for 3 to 21 days, occasionally opening the lid to release pressure. Add or remove brine as needed throughout fermentation if the level is not maintained at 1-inch below the lip of the jar. You should see occasional tiny bubbles rising along the inner sides of the jar as the veggies begin to ferment. (I find that 21 days is preferred for flavor and texture.)
- Refrigerate the finished kimchi after fermenting. If you're using a lid with an airlock, replace it with a regular lid before storing it.
- Serve with beef, chicken, pork, seafood or alongside rice or other vegetables.
Notes
Nutrition
Have you ever fermented food? What’s your favorite fermentation recipe?
Carolyn Erickson is a wife, mother, gluten-free/traditional food blogger, and volunteer co-leader of The Weston A. Price Foundation chapter in Charlotte, North Carolina. She teaches local workshops on preparation of nourishing foods such as bone broth, lacto-fermented vegetables/fruits/beverages, cultured dairy, as well as gluten-free & grain-free treats. You can follow Carolyn on Facebook, Pinterest, and Instagram.


Is this supposed to be lacto-fermented? Shouldn’t there be some whey in there? Just wanted to clarify as at the bottom of the recipe you mentioned lacto ferments. Thanks!
Hi Kate, it is my understanding that the word “lacto-fermented” means both “fermented with lactobacilli” and “favoring the growth of desired lactobacilli.” Though in many cases whey is used to get good bacteria started, it’s not always necessary in order to create an environment that favors the growth of lactobacilli. In the case of kimchi it is not needed. Hope that helps!
PLEASE PLEASE tell me where you got those awesome jars with the glass lids and side clasps!!!!
I would do anything to find those!!!!!!
and great recipe 🙂
Much love,
Sarah
Sarah, the jars are made by Weck. I have several of them and they’re awesome 🙂
So happy to see my native food, Kimchi, being featured as healthy food everywhere. And great to see it here on Mommypotamous!
Despite the westerners’ criticisms about the foul smelling and strange looking veggie, kimchi has been our staple food for centuries. I can’t even eat pizza without kimchi, which, by the way, is to die for…kimchi topped pizza. Yum! Oh, and on hot dogs, instead of sour kraut! And hamburgers…so on…
Anyway, I love Carolyn’s recipe and is very similar to the one I have on my blog. Yay! http://www.ecokaren.com/2010/08/kimchi-recipe-demystified/
The only thing I’d suggest is to wash the cabbage before using. Even though the leaves are tightly grown, dirt, and, sometimes, dead bugs can be found in between the leaves. (especially organic napas) Ewwww, I know. And, you don’t have to grate radish. In fact, I love radish kimchi with just radish. They become crunchy and delicious after being fermented! You can even make cucumber kimchi too! (shown in my post)
Great job Carolyn! My grandma would be proud of this recipe! 🙂
Thanks! I was wondering what I’d put it ON since I don’t really do starches, so I appreciate your examples!
I’ve been looking for a good kimchi recipe for a while and I’m excited to try this!
Could I leave out the fish sauce or would that throw off the fermentation somehow?
Thanks!
Hi Erica!
Yes, you can omit the fish sauce. 🙂 The salt and naturally-occuring lactobacilli will take care of the fermentation. Hope you enjoy the kimchi!
-Carolyn
Erica,
Heather says it will change the flavor but not affect the fermentation process.
How do you sterilize the jars?
Allie, You may find this post helpful: http://www.countryliving.com/cooking/about-food/sterilizing-canning-jars.
I am unable to eat dairy, not even yogurt with this pregnancy, which usually I can tolerate. So since I know the benefits of probiotics to myself and to my growing baby I have tried eating lacto fermented veggies but I always end up with digestive problems afterwards. Is there a reason for this?
YES! Finally I find a recipe that doesn’t use sugar to make Kimchi. Thanks!
You can grate some apples instead of using sugar 🙂
Once made, how long does it last in the fridge. And can you freeze it?
Another wonderful recipe! I know that I can always trust your food recipes and also your DIY. I do have one question. Should this be in the dark or just on the counter away from direct sunlight?
Thank you so much Heather and also your dedication to us all! Lori
Aww, thank you for the kind word, Lori! And great question. I usually cover mine with a kitchen towel or keep it in a cabinet 🙂
Thank you so much!
Wouldn’t some added whey help with fermentation? Like 2 T. Would it hurt to add to this recipe?
Our family really enjoyed this recipe and I want to keep making it. It was very salty for us so I was wondering if one tablespoon of salt would be enough for the fermenting process to happen.
Thank you so much. Lori
Made this and love it! Here’s what I did differently, based on what was available to me:
Used green cabbage from garden, not Napa.
Used sweet onion from garden, not green.
Did not peel garden carrots.
Fermented for three days in mason jar with new nylon stocking stretched over lid to allow for aeration without infestation. Excellent! Now stored in fridge for further fermentation, but probably won’t be long as I’ll eat it quickly. Warning: this is very addictive 😉
This recipe is very different from the ones Koreans consume daily. Although there are many varieties of Kimchi, the common one is a lot hotter due to more hot pepper powder and garlic used. I think this one is modified to fit the non-Koreans’ taste buds.
I have never had mold problems, and I don’t even sterilize, I just use a clean container and it’s fine. I think the mold might be because the recipe is somehow unbalanced. But then, leave it at room temperature for one day with my recipe, and put it in the fridge.
Don’t get me wrong, I am not criticizing. I am Korean born and raised and love Kimchi being recognized, but I think this recipe is too different from an ordinary one to be introduced as Kimchi maybe?. I am no food expert though…
hi
so mine got mold on the top . what can and or should I do . such a sad day !!
I used half a cup of hot pepper flake, I like it hot like traditional kimchi.
I am just wondering about the fact that there are no sugar to help fermentation. Wouldn’t it be better to add sugar or some kind of fruit?
Thank you for this recipe Heather! It looks great. I have never made kimchi personally, but I have made sauerkraut and they seem very similar – I’d just need to throw in some chili powder and boom! Kidding.. but thanks again for sharing this! I can’t wait to try this at home.
I’m having difficulty finding fish sauce locally. Could I substitute diluted anchovy paste?